Which is why you see one in the photo. However, I had already started putting together this new card design before I bought it.
Quarantine has brought about A LOT of unexpected things, like losing track of days and having too much time with nowhere to go.
I felt it was high time to dust off the old craft supplies and create something new and pretty. I hope you enjoy them as much as I did making them….
And now for some shameless self-promotion: These are original, 100% handmade, inspirational greeting cards for any occasion (blank inside). $5 each / discounts for bulk orders, tbd / *Local* delivery or pick-up available. (*Anything within reasonable distance of Ontario/Upland, California)
Please, message me if interested. 12 cards available.
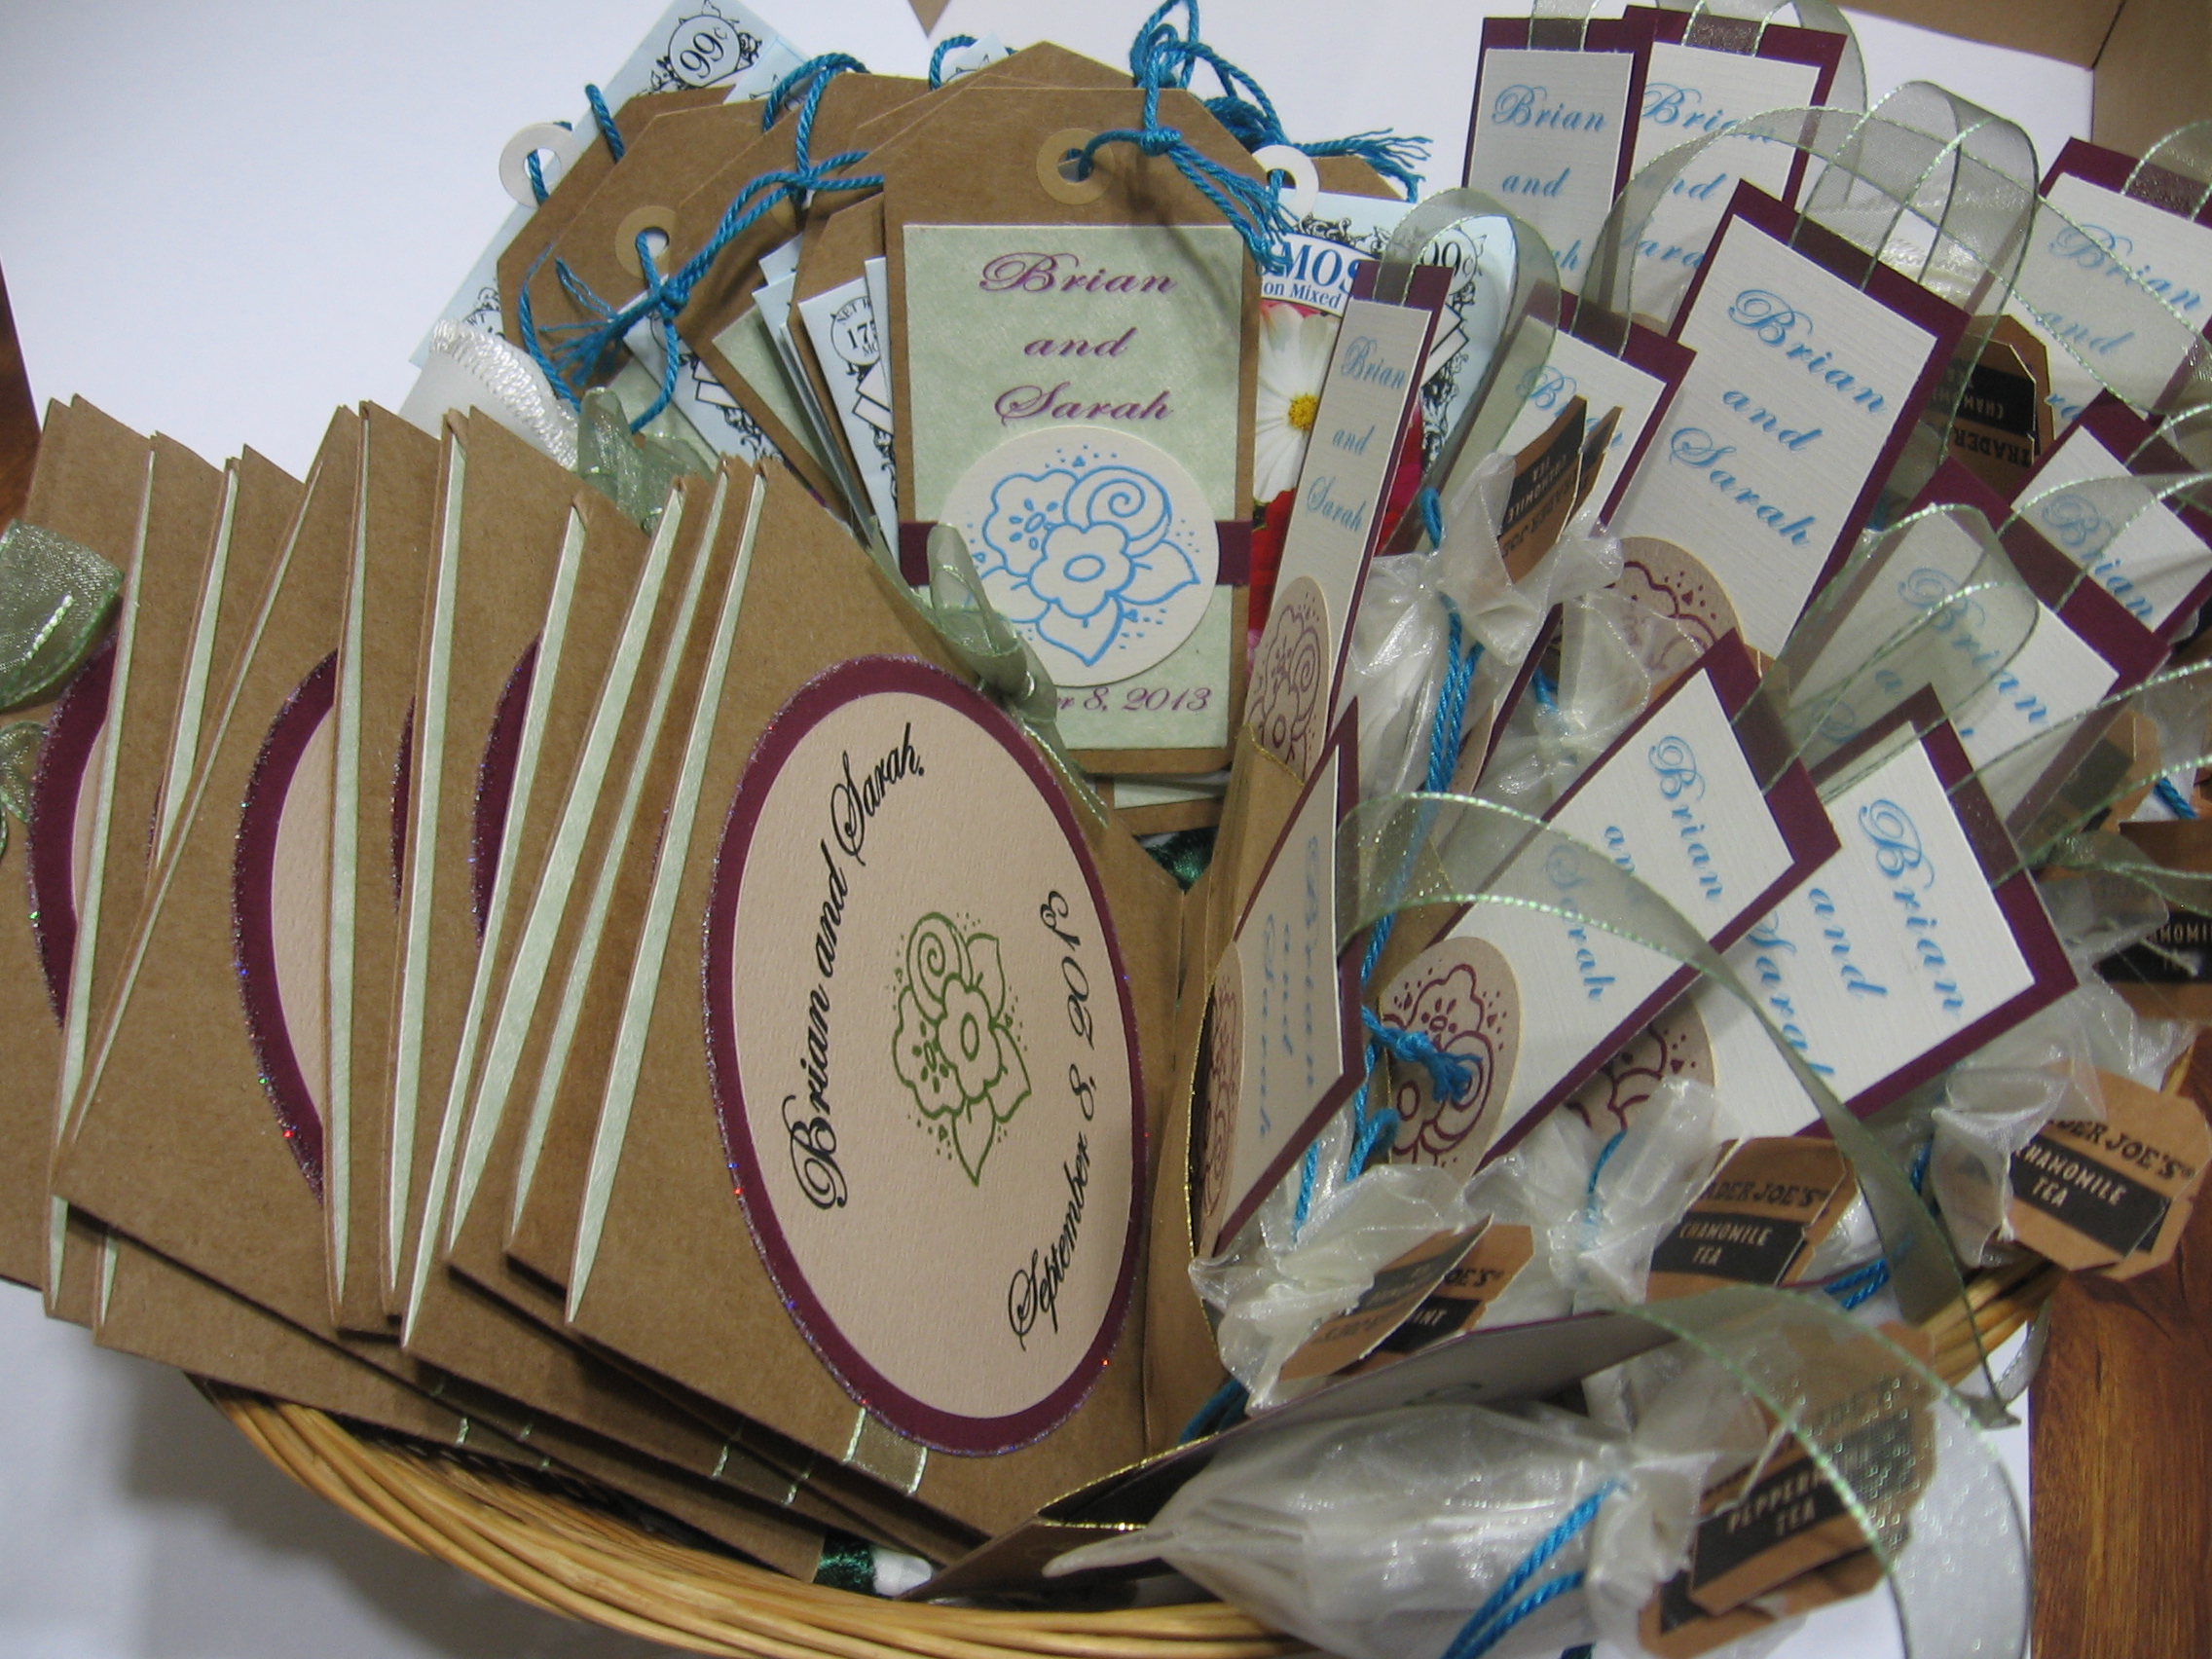
A few years ago, my friend decided to have a rather impromptu wedding and didn’t even send out formal invitations. She told me she didn’t want a big fancy traditional wedding, and that’s OK. But part of what make weddings so special (aside from the gooey romance bit) is that it is a rite of passage from single life to married life. She was leaving the tribe to set out on her own, as it were. And from a cultural standpoint, the rituals associated with these moments are just as much for the tribe being left behind as they are for the individual leaving.
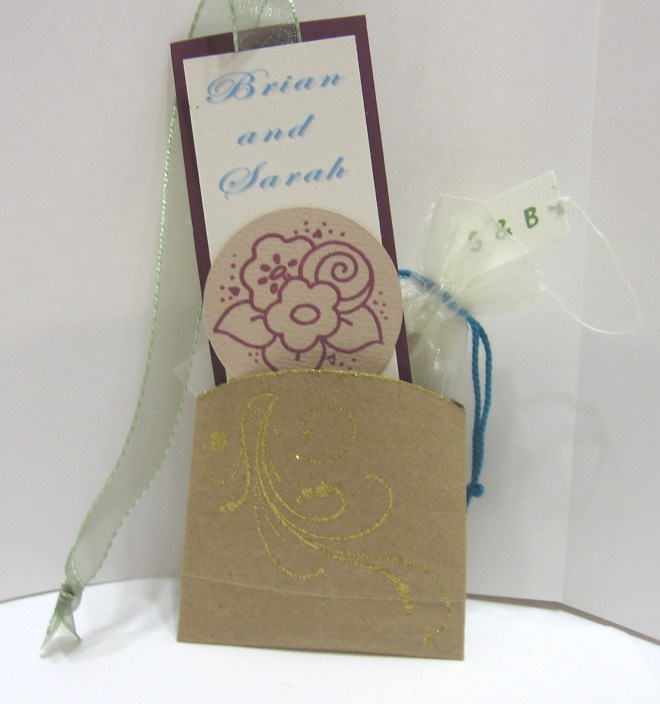
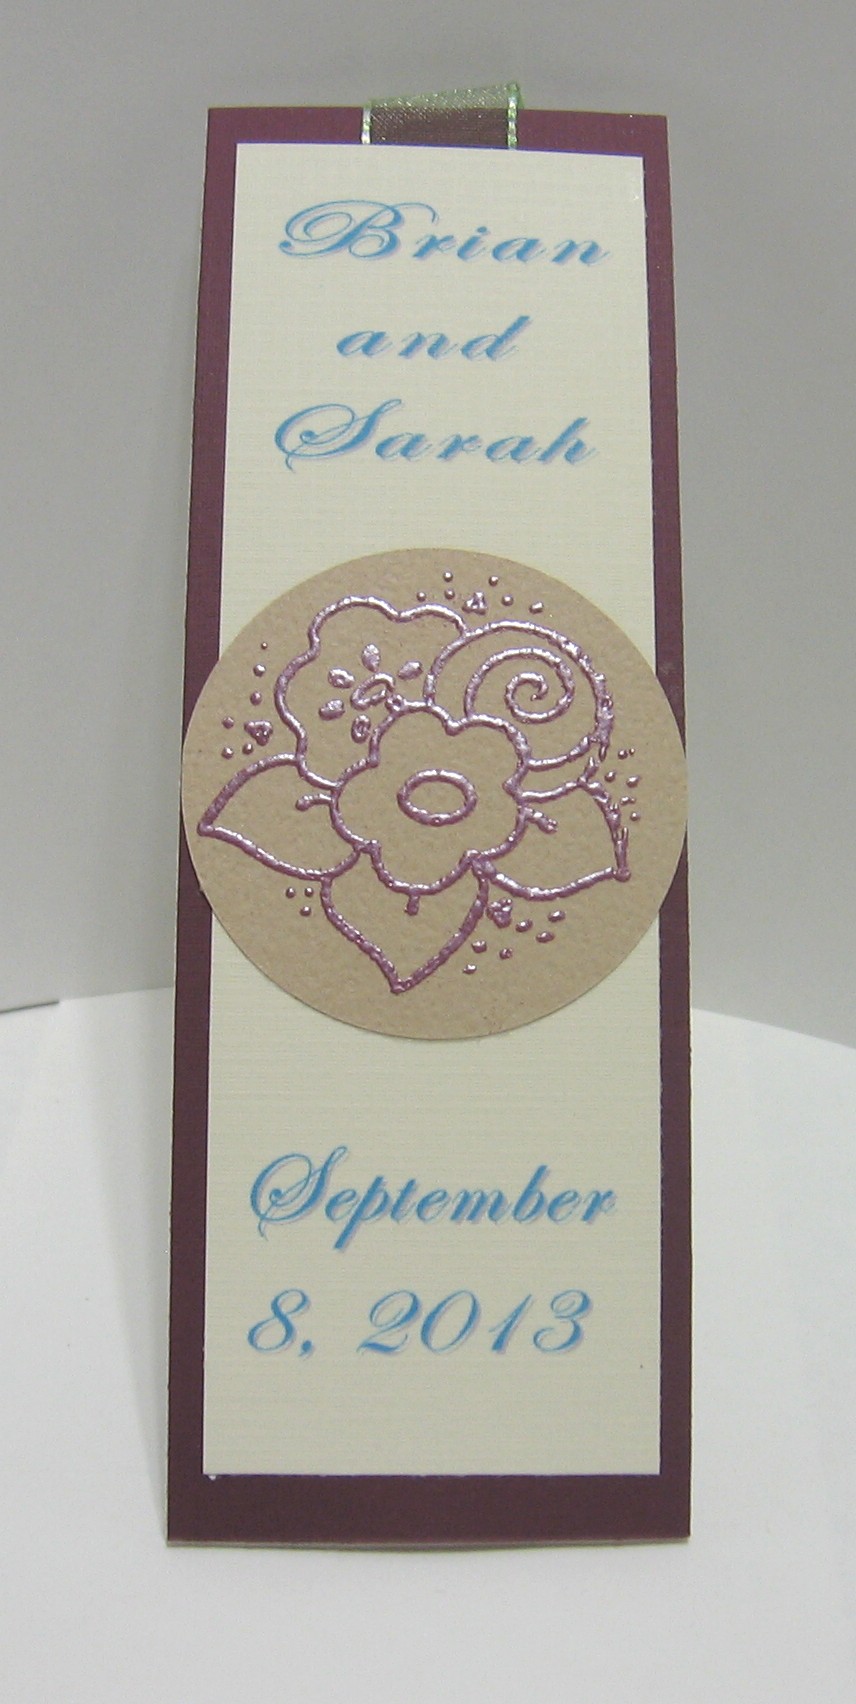
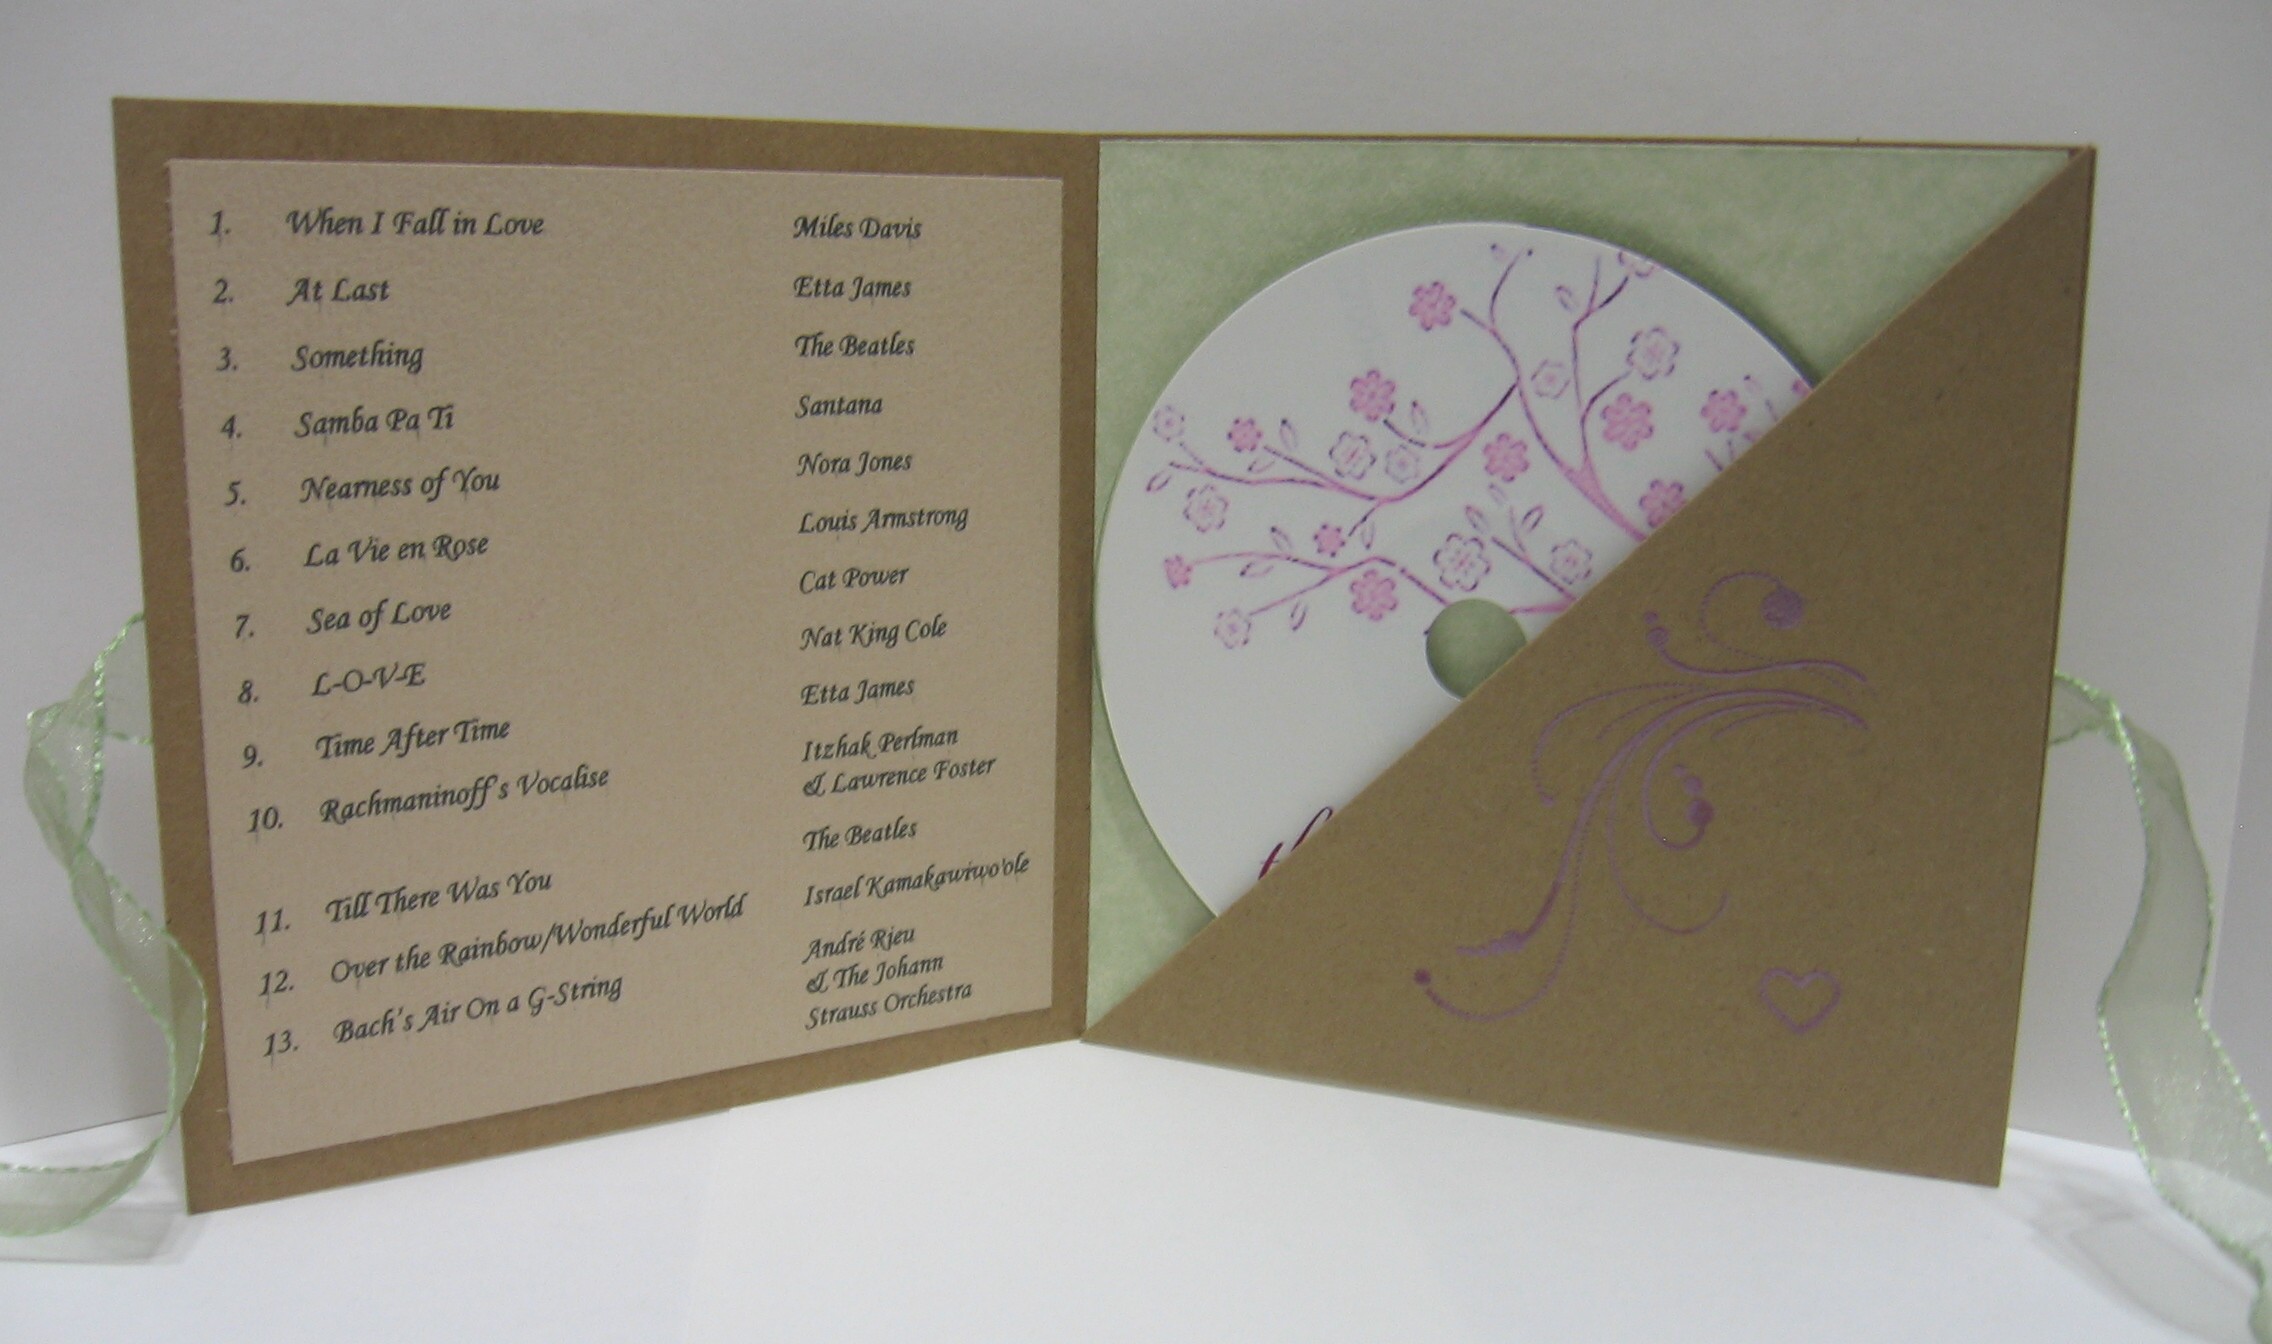
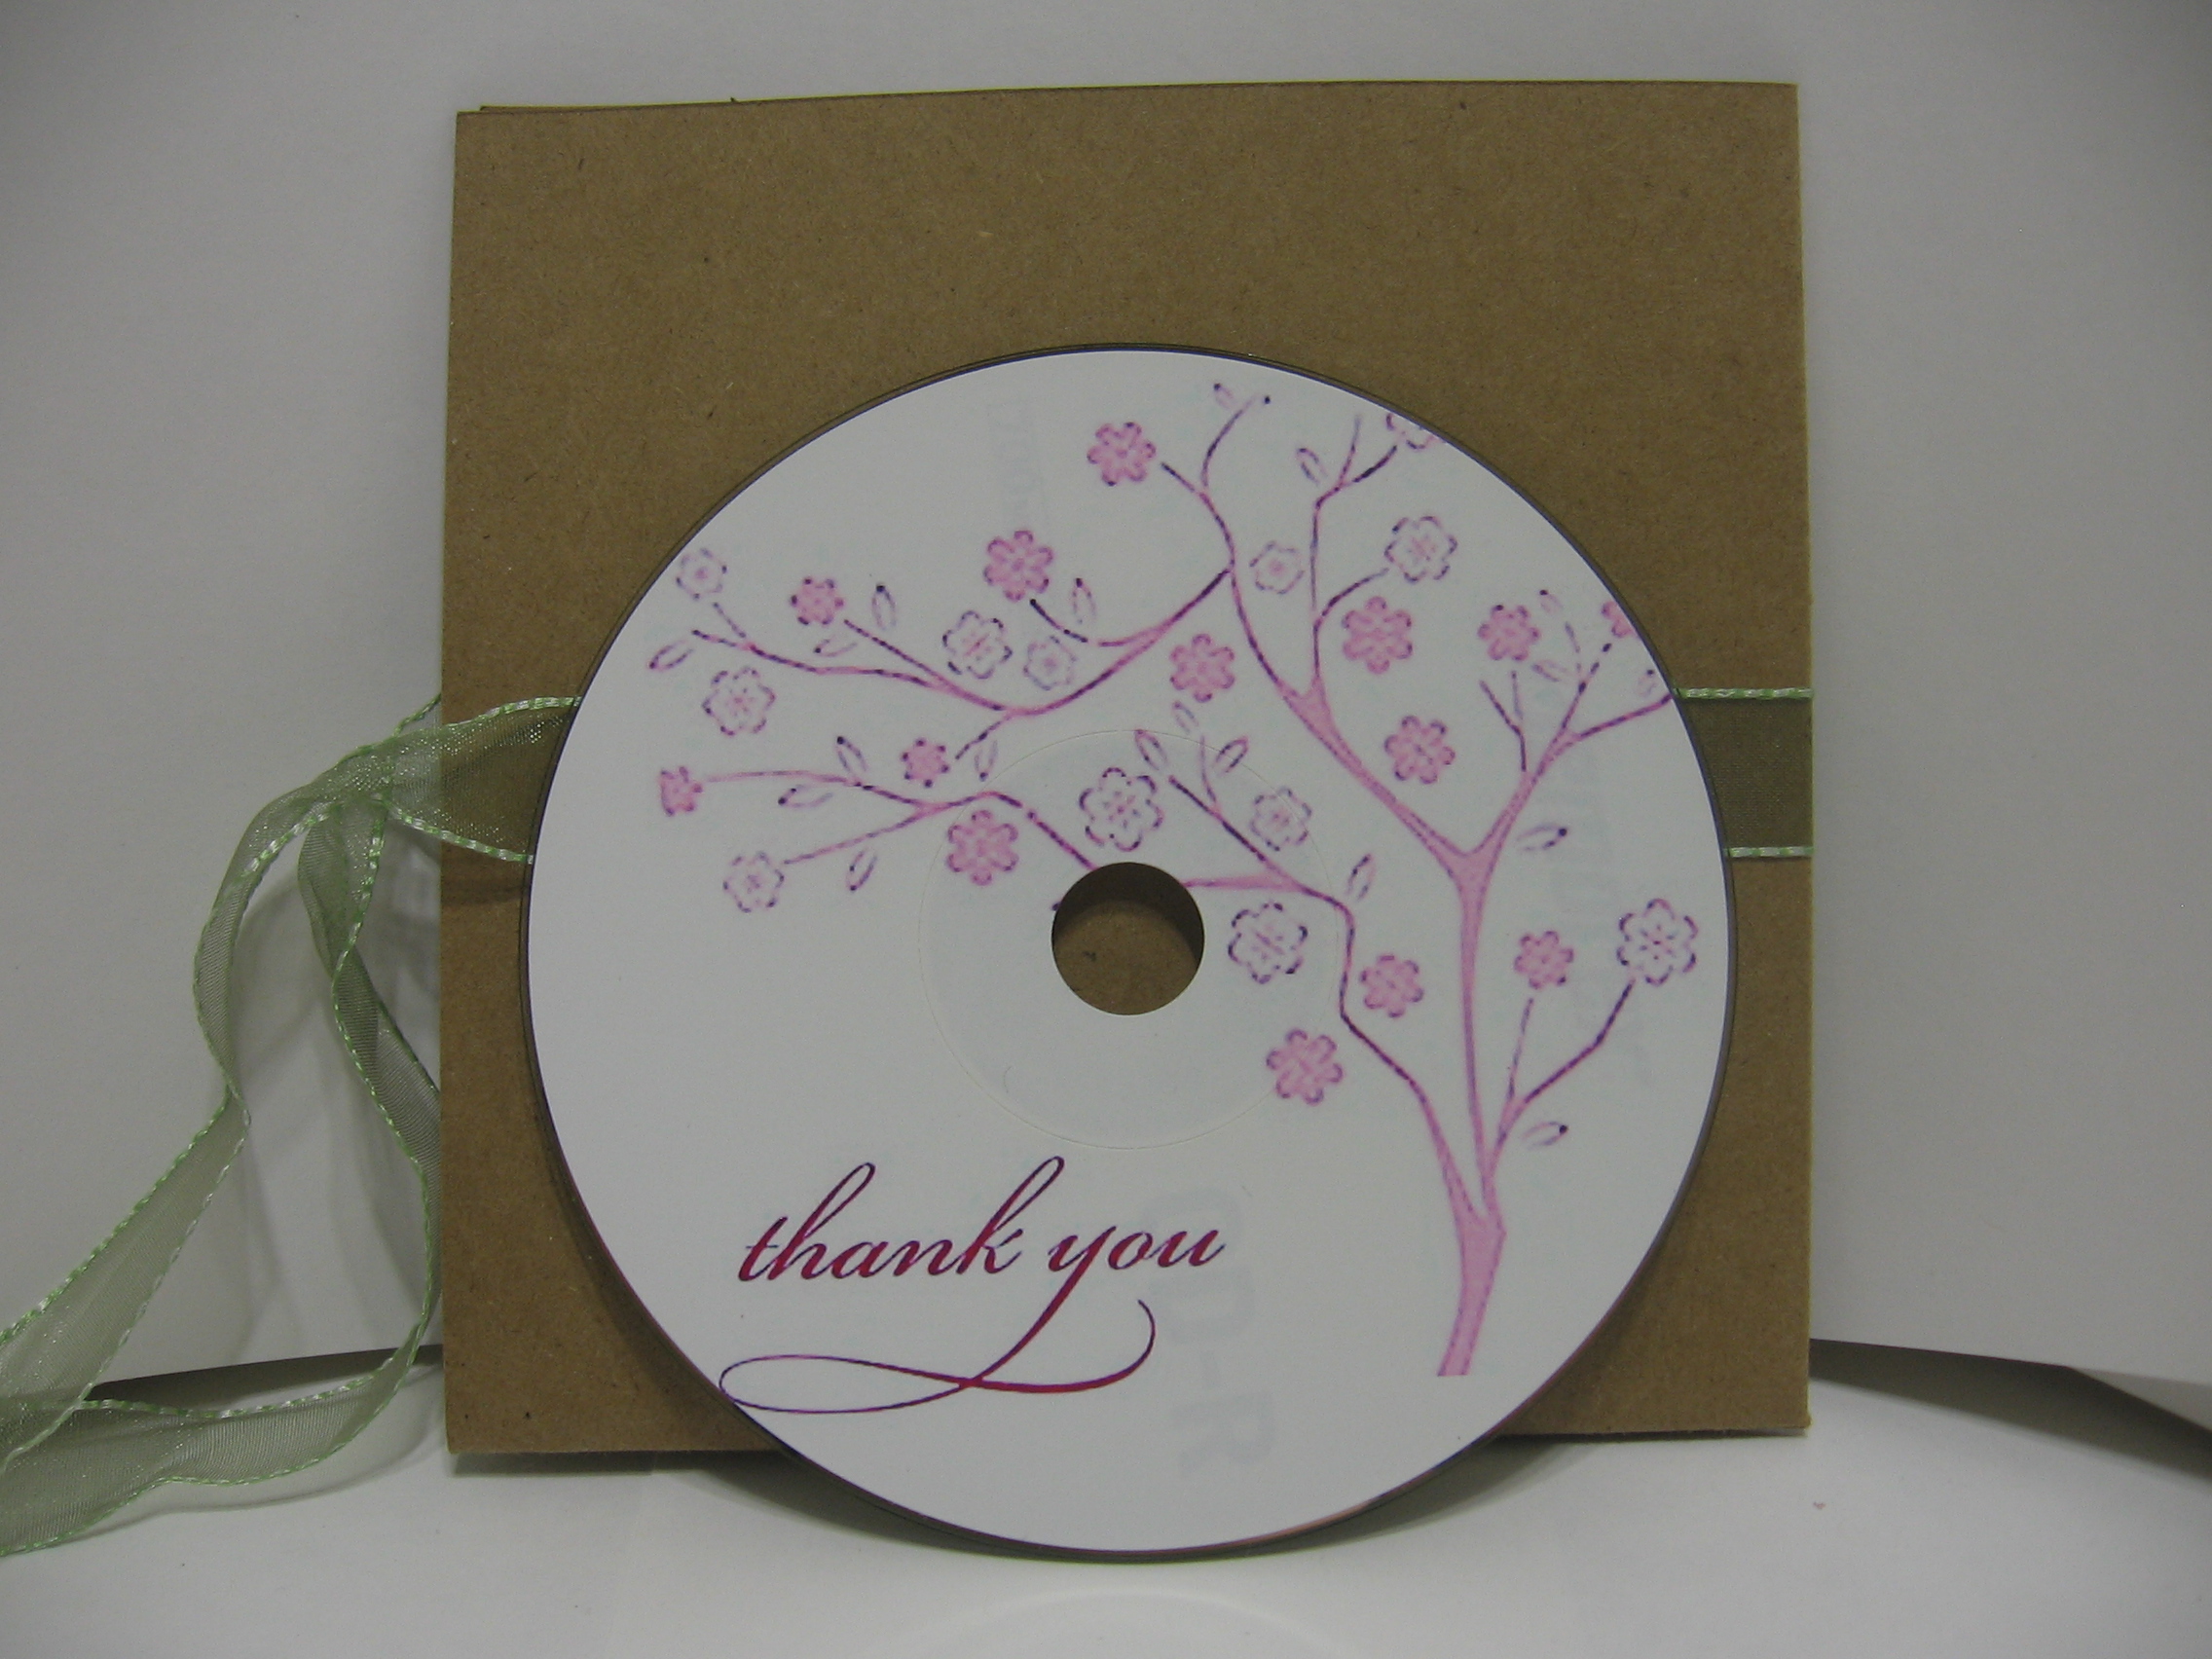
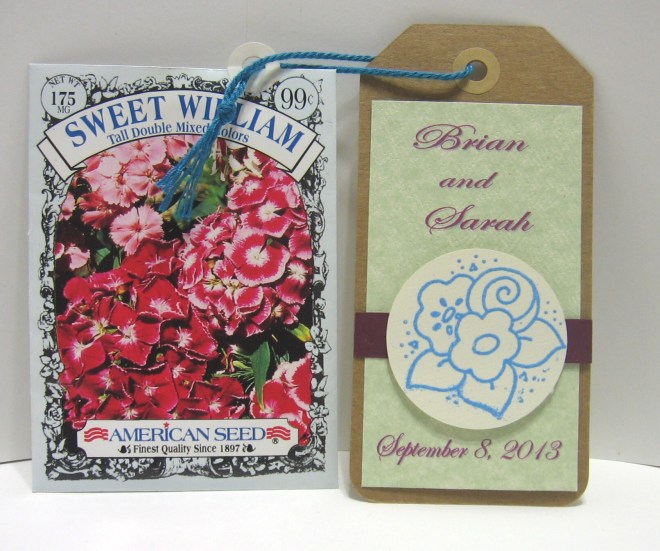
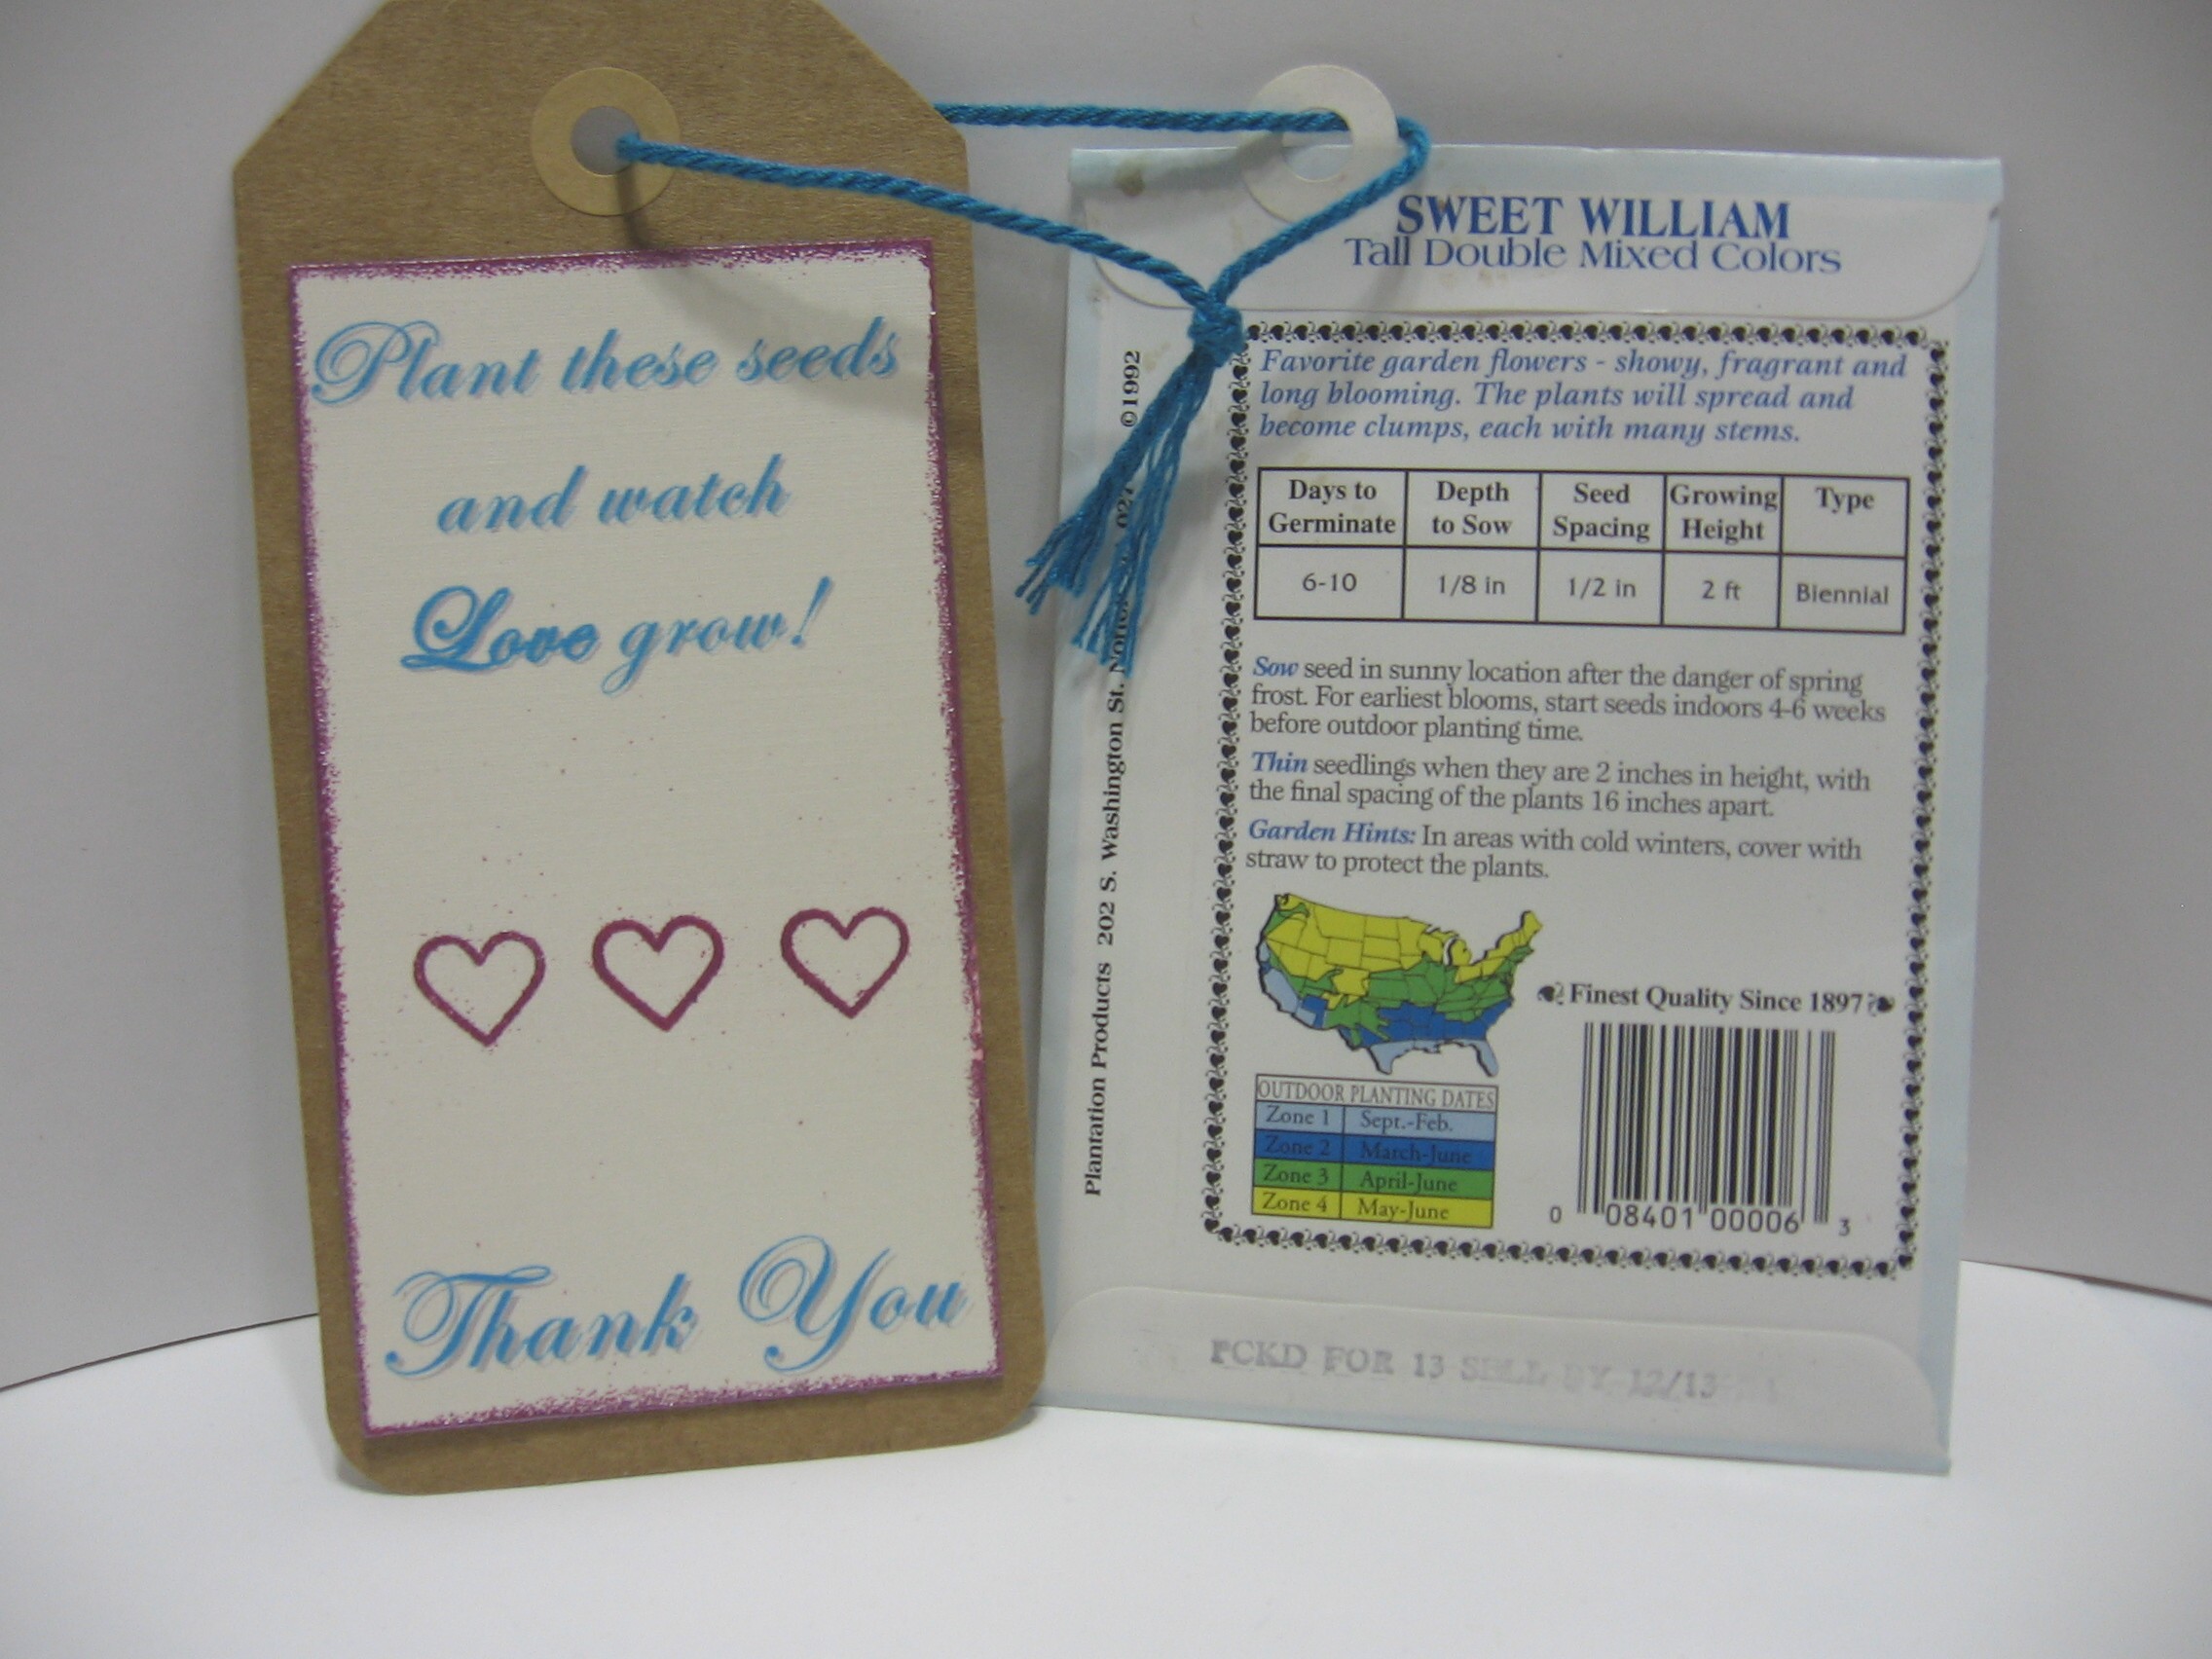
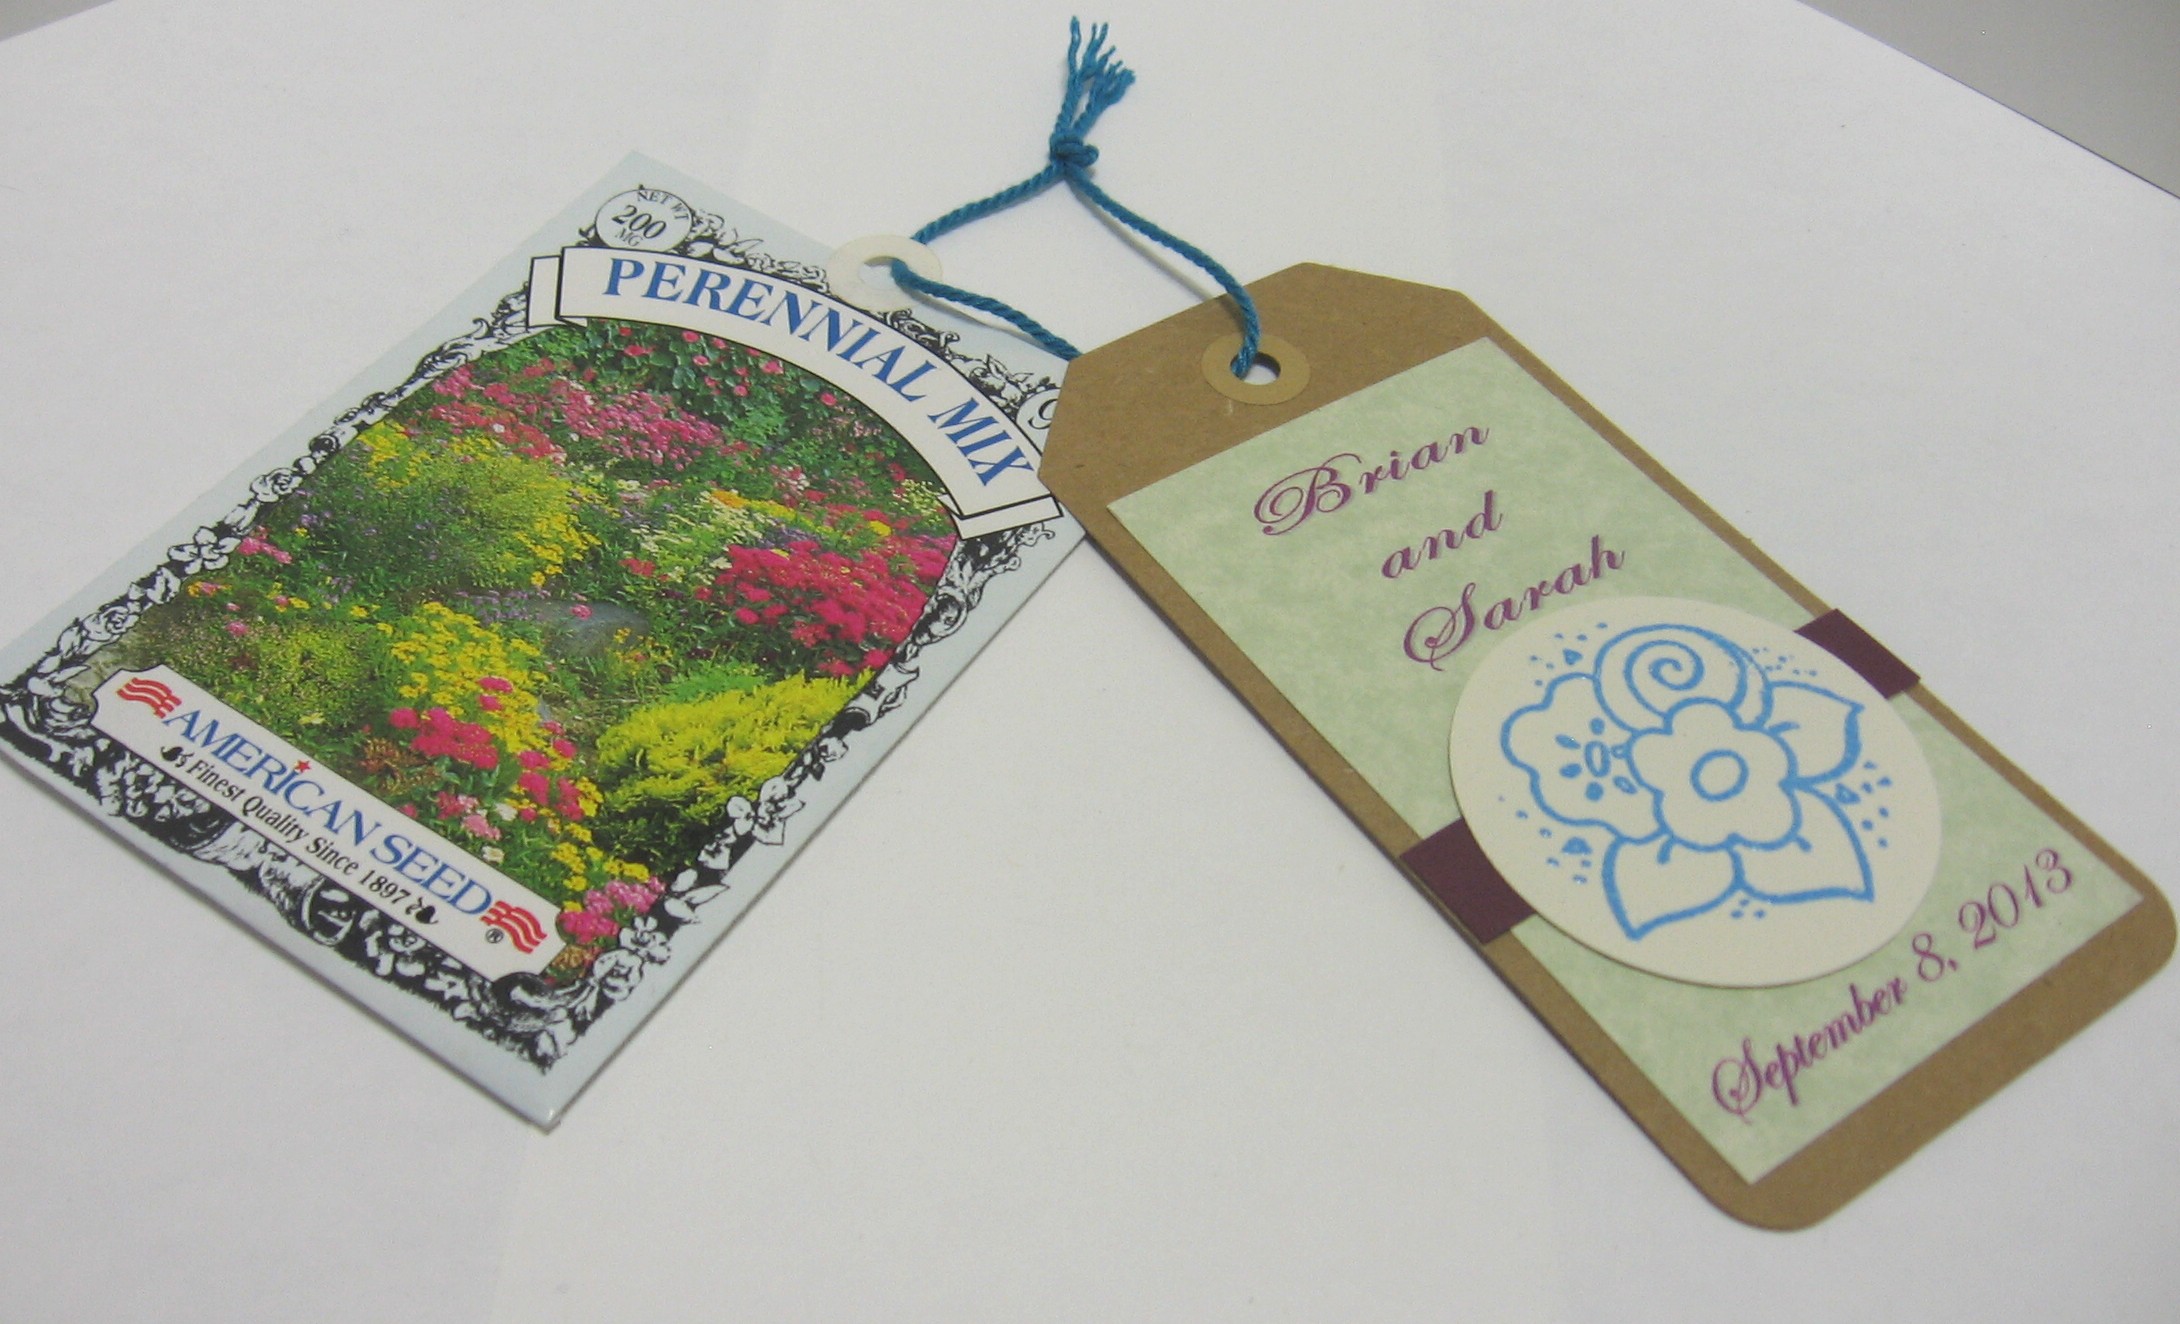
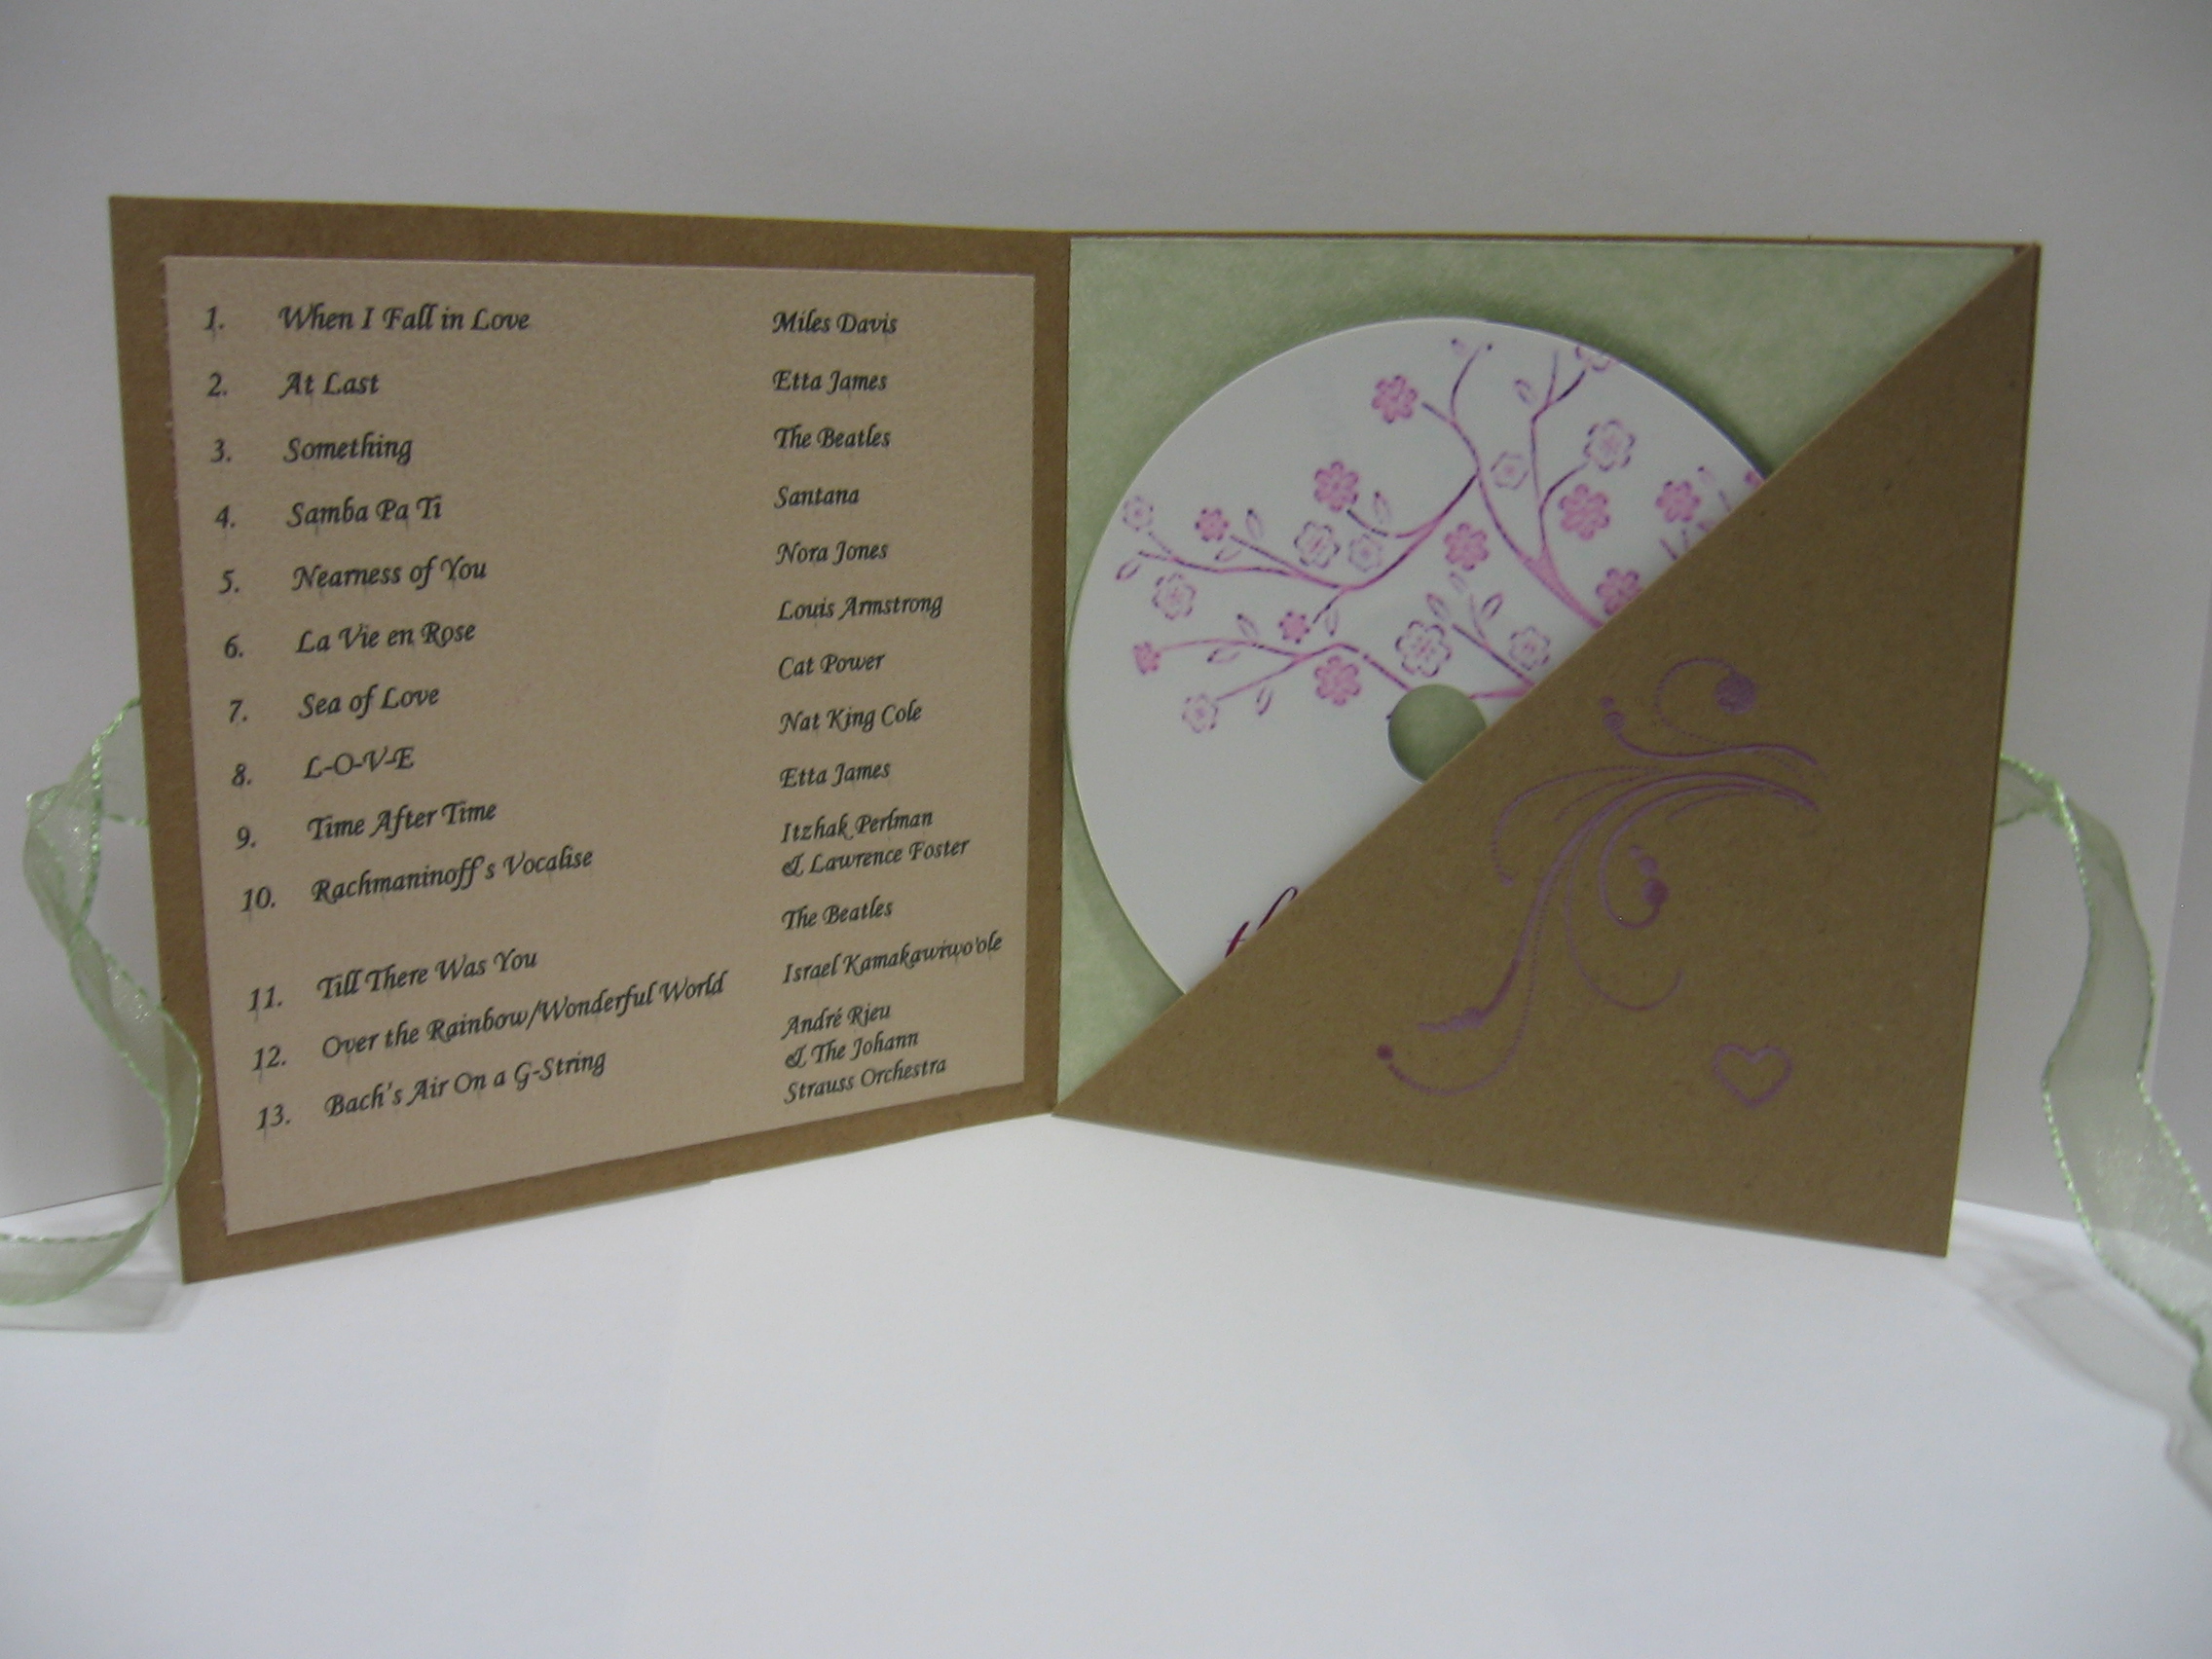
So I told her I was going to make her some wedding favors (notice that I didn’t ask) and she said “OK, but something simple”. I made three prototypes: a CD, a bookmark with teabags, and a seed packet with a special tag. She ended up loving all three and so I made enough so that everyone could walk away with at least two favors.
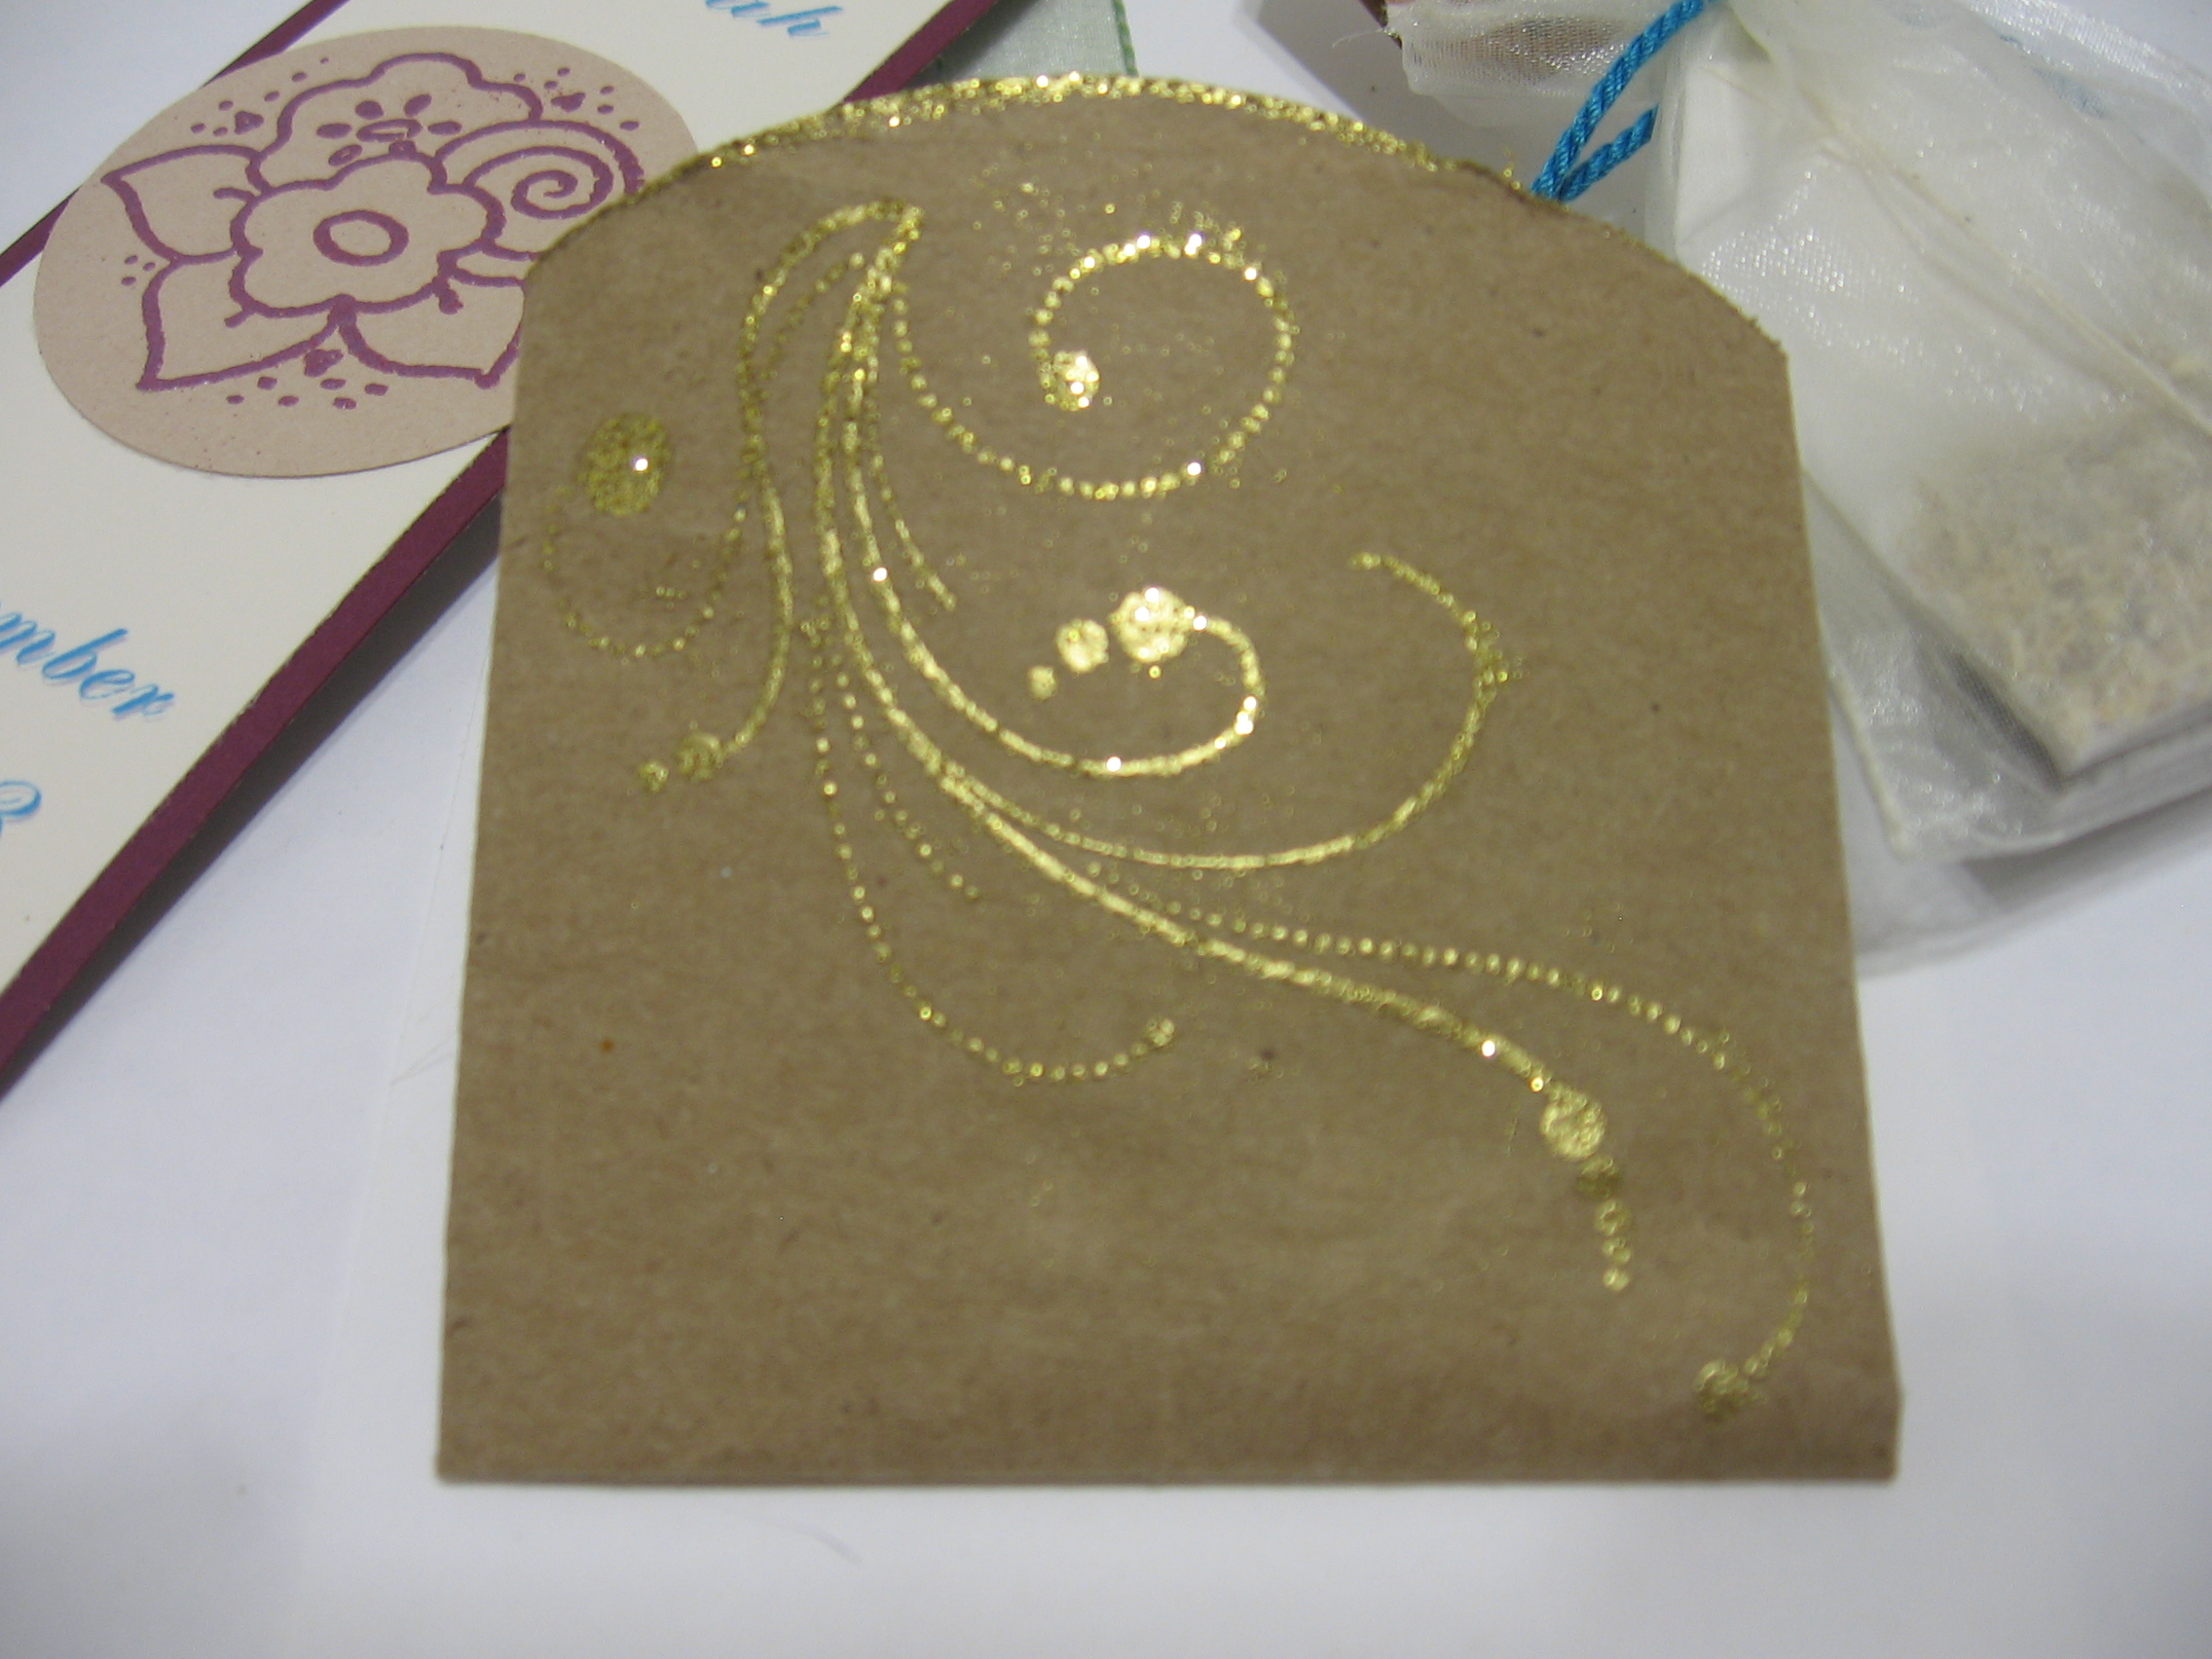
1. Bookmark and Bag of Tea I up-cycled some paper bags, embossed the edges and stamp with gold, and folded it into a pouch. The bookmark is 2-sided, with embossed stamping on both sides. The tea bags have an embossed tag with the bride and grooms initial.
2. CD For these, I used my photo printer to print directly onto the CD and print the playlist. I made the CD holder out of heavy card stock with embossed stamping and edging on the front layers.
3. Seed Packet with Tag I used prefab tags, but changed the chord to match the color scheme. One side has the repeated design, the other side has embossed edging and stamping.
Final Thoughts
These weren’t difficult to make, but they were time consuming because of all the details. I tried to make each one unique but also alike in some way.
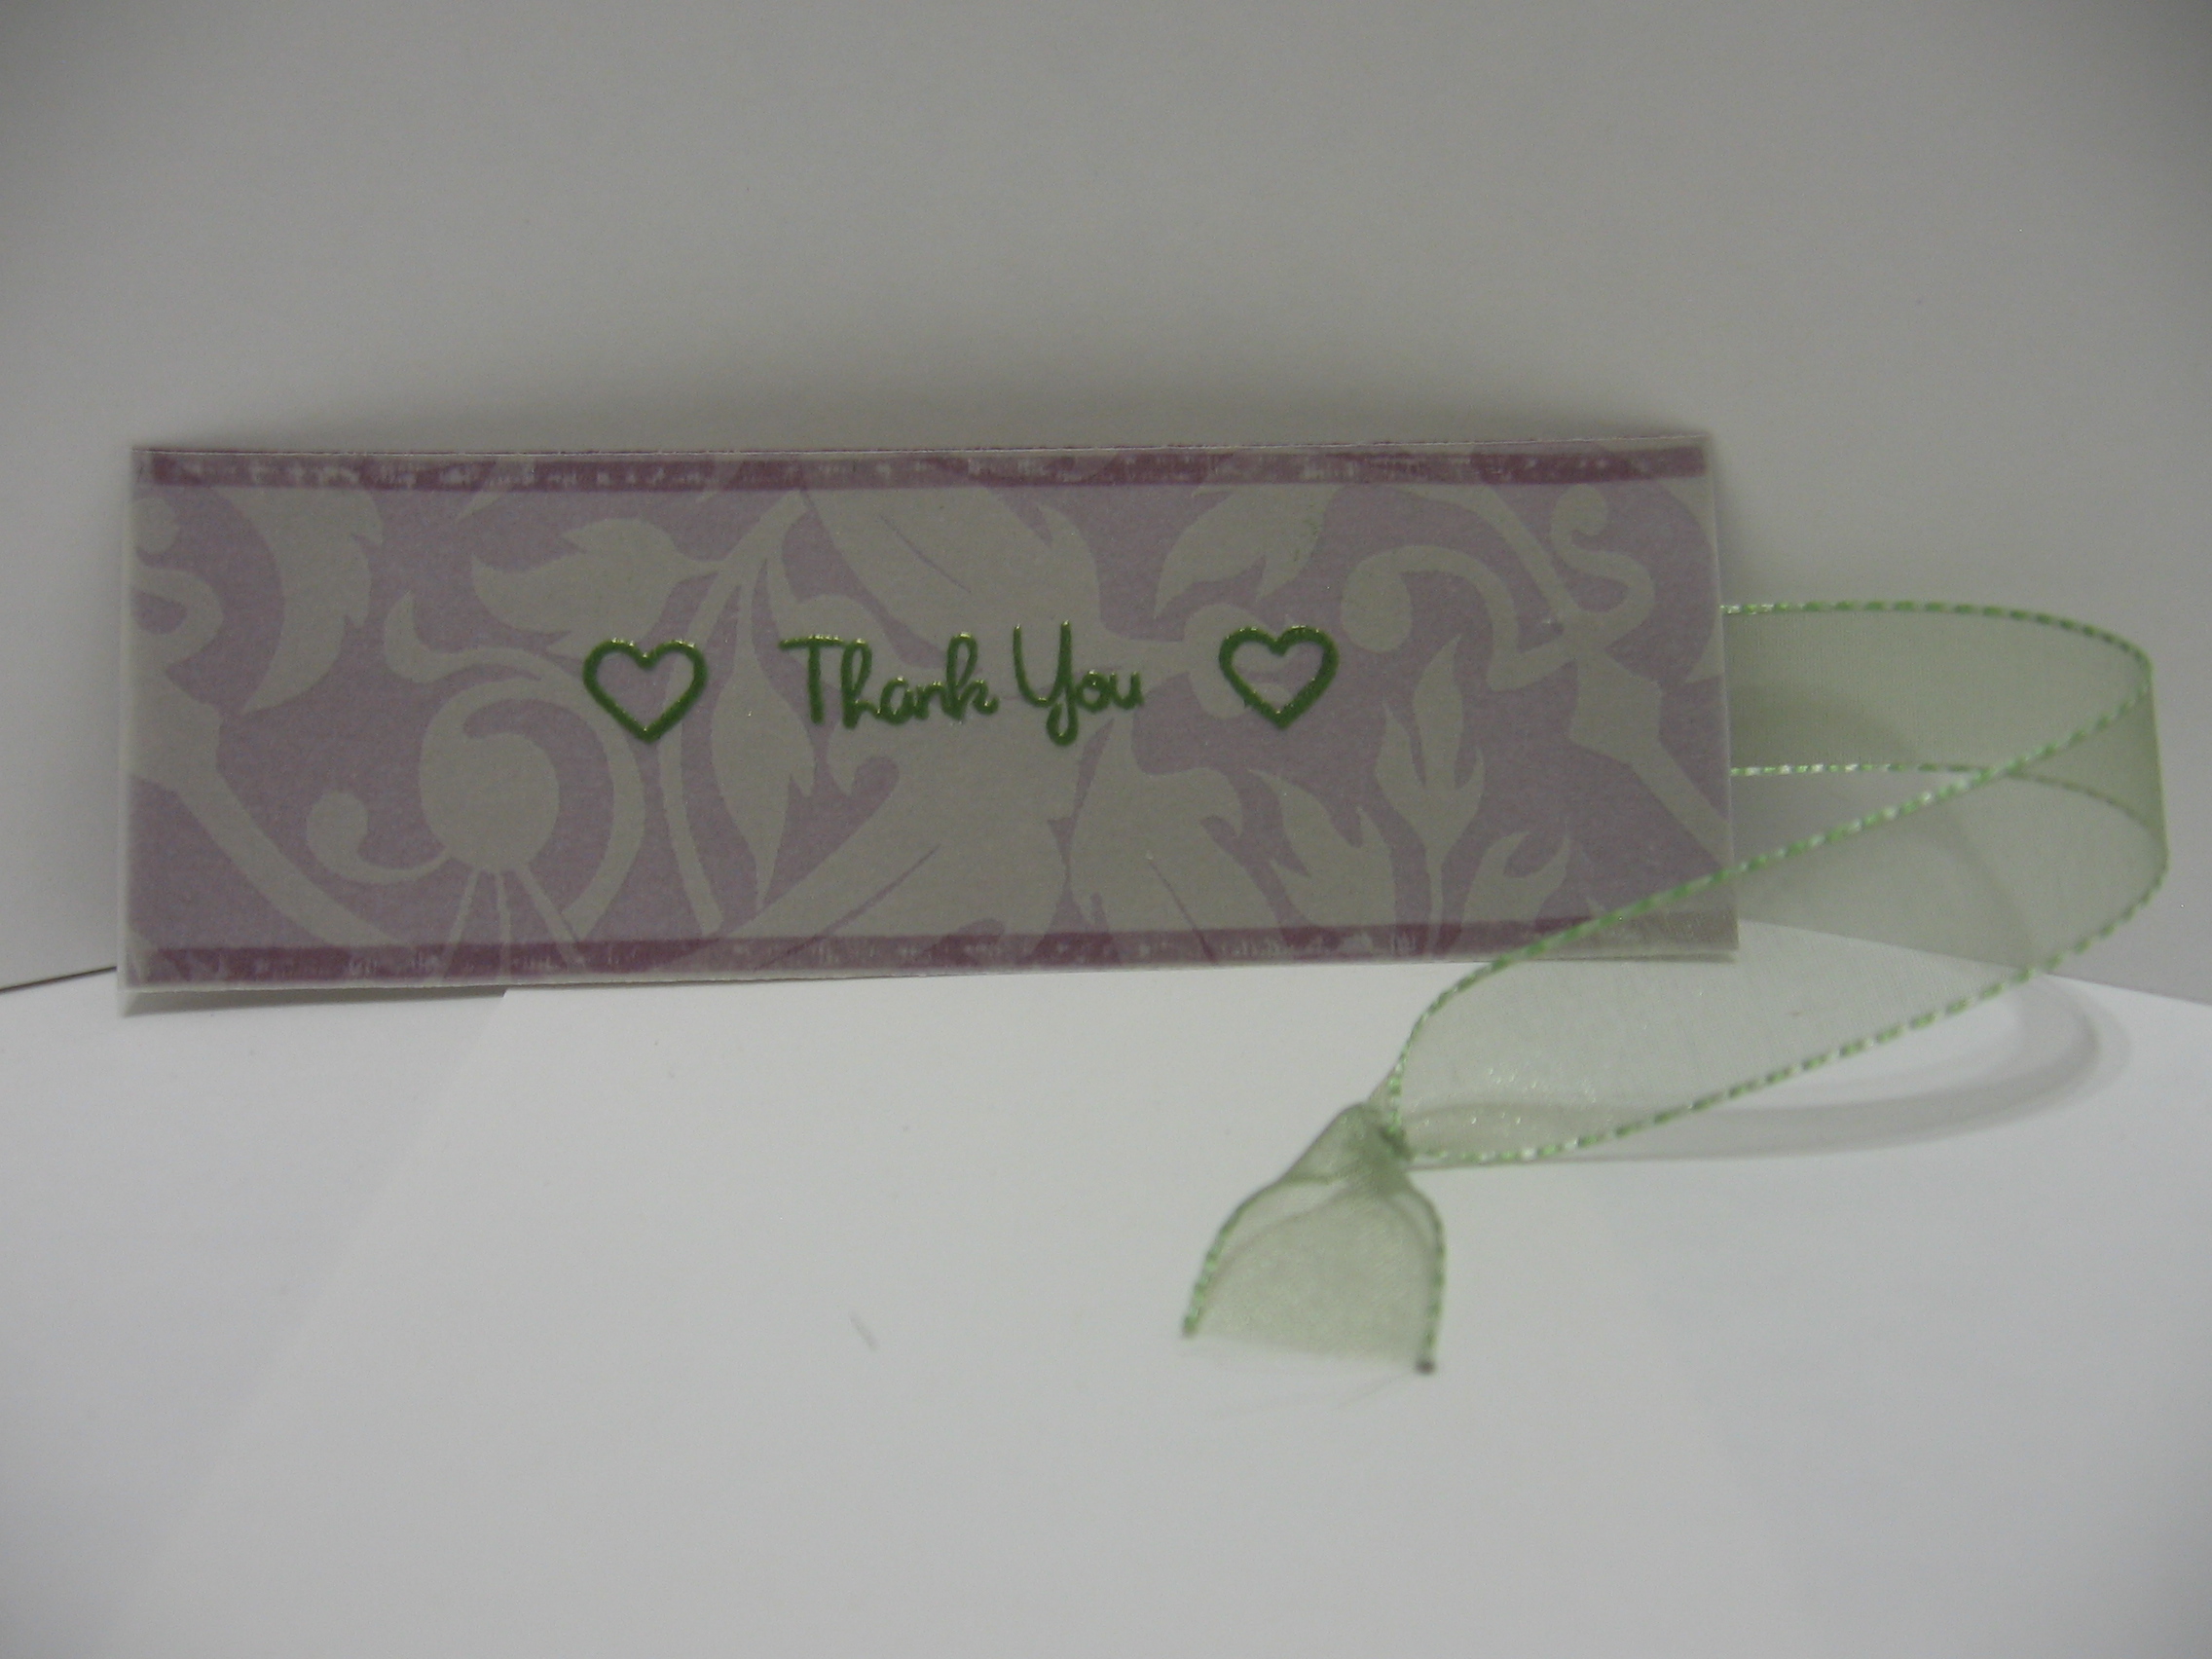
One tip I can offer for those working on similar large projects is to pick one or two central themes and build around them. For this project the flower stamp in a circle was integral to everything! I picked three basic colors: burgundy, green, and blue – and made sure to incorporate them into each design in slightly different places.
The best part for me was they actually look quite lovely, in spite of the rough home made quality they inevitably had. The best part for my friend was that they were one of a kind and fit in perfectly with her laid back, small wedding.
In the end, she realized that I was doing it for myself as much as for her because her wedding was so small, she didn’t even have bridesmaids or anything. Now, I’m a part of her wedding for all time.
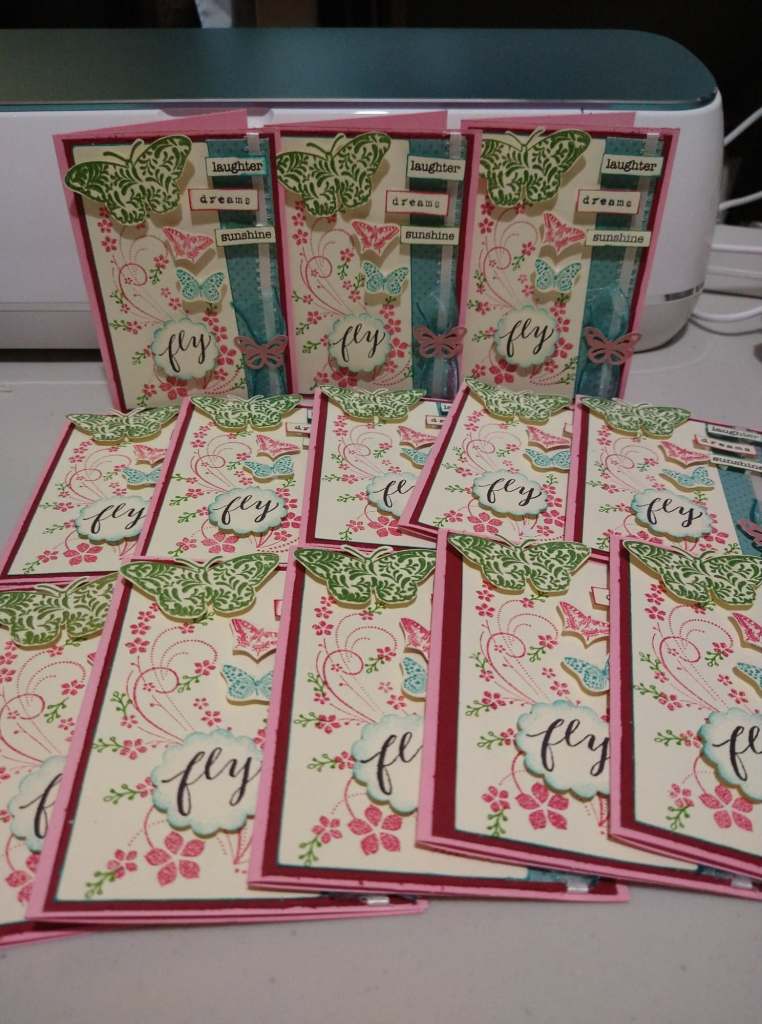
I haven’t been able to build up much inventory over the past few months with moving and focusing on the job search and whatnot. Luckily, my friends still ask to buy my cards, so I’m able to stay inspired. This has lead me down two roads.
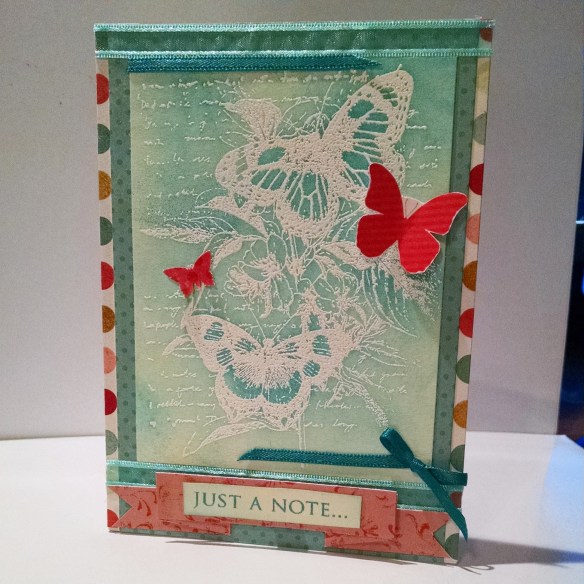
The first road is making crafts on a budget, which is essentially what I have always done. Not only is this due to the fact that I have more time to craft when I’m out of work but also because even when I had a good job I couldn’t justify spending money on a Cricut or something like that. So when I started making cards last year I was making them from scratch. Sure I bought embellishments and stuff, but my cards took on a certain style simply because of the resources I had available (and what little techniques I knew back then). Over the past year, I have spent a lot of time reading crafty blogs, watching YouTube videos, etc., and I still feel like a beginner at times. The latest technique that I learned is showcased in these cards: I love it! What you do is emboss your stamped image with clear or light colored powder and then use distress ink over the image in layers. The embossed image resists the ink and you get some awesome color effects this way.
The other road I mentioned above is one of buying greeting cards on a budget. My friend Maria was looking for cheap simple thank you cards that she could send out to a whole bunch of people. Since my cards aren’t “cheap” she didn’t think to ask me. But it made me realize that I should work on some simpler designs that use less materials and take less time so that I can offer them for half my normal price and not feel like I’m cheating myself. So these are the first batch. Thank you Maria for the insight and inspiration:
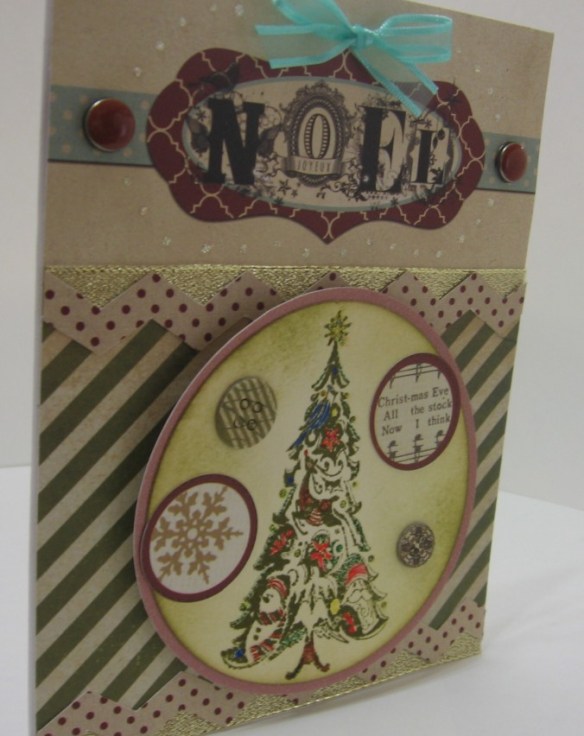
In part one, I shared how one stamp could be conceptualized differently by several people and in part two, I demonstrated how one of my stamp concepts changed and improved over time. In this, the final Christmas 2013 post, I give you several different cards I made sporadically throughout the season.
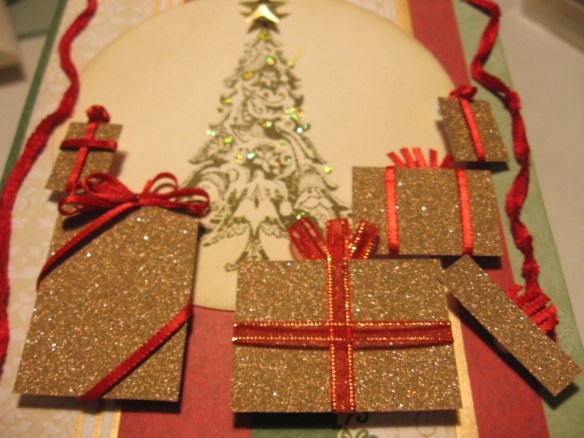
I was inspired by a lot of amazing handmade cards on websites like Pinterest. In particular, I wanted to emulate ones that used 3D effects such as presents that look like real boxes. I came up with this:
I would have liked the presents to look more like boxes but I think they came out pretty good. The card as a whole didn’t have the finished look I wanted, but not bad for a first attempt.
The downside of a project like this was the time it took to make each little box. I actually got several orders for Christmas cards (thank you everyone who bought them!) and I needed to focus on the designs that I could duplicate easily.
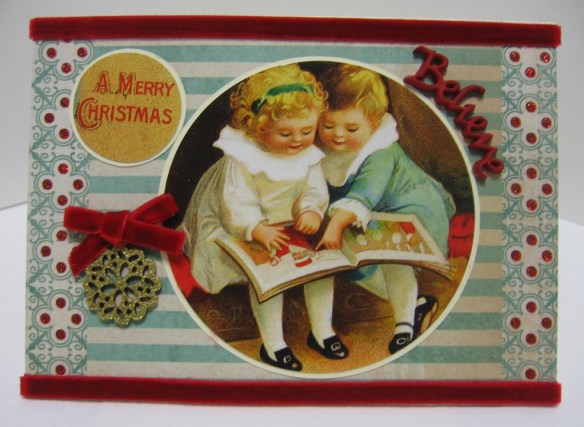
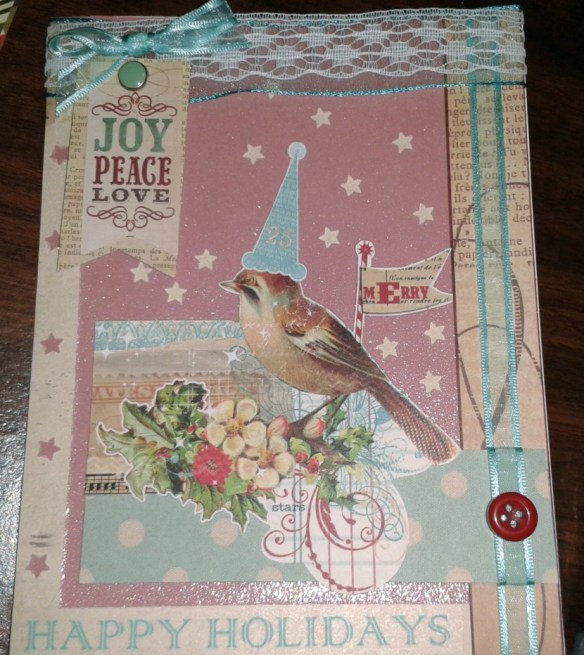
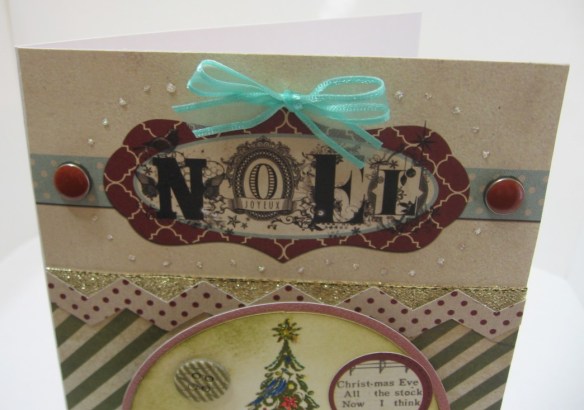
However, I was also inspired by some Victorian postcards I found last year and I designed a few more one of a kind cards.
The golden snowflake was a woodcut that I painted and then heat embossed.
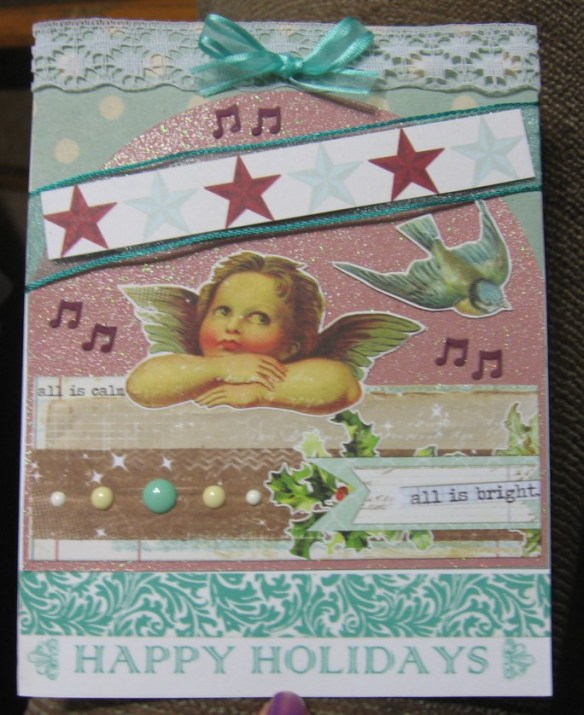
By this point, I felt pretty confident in what I wanted the finished products to look like. I revisited the Christmas tree stamp from the first card and gave it a new look.
I had the opportunity to make A LOT of cards in a short time and therefore improve my skills through practice. If you look back I think you can see the difference.
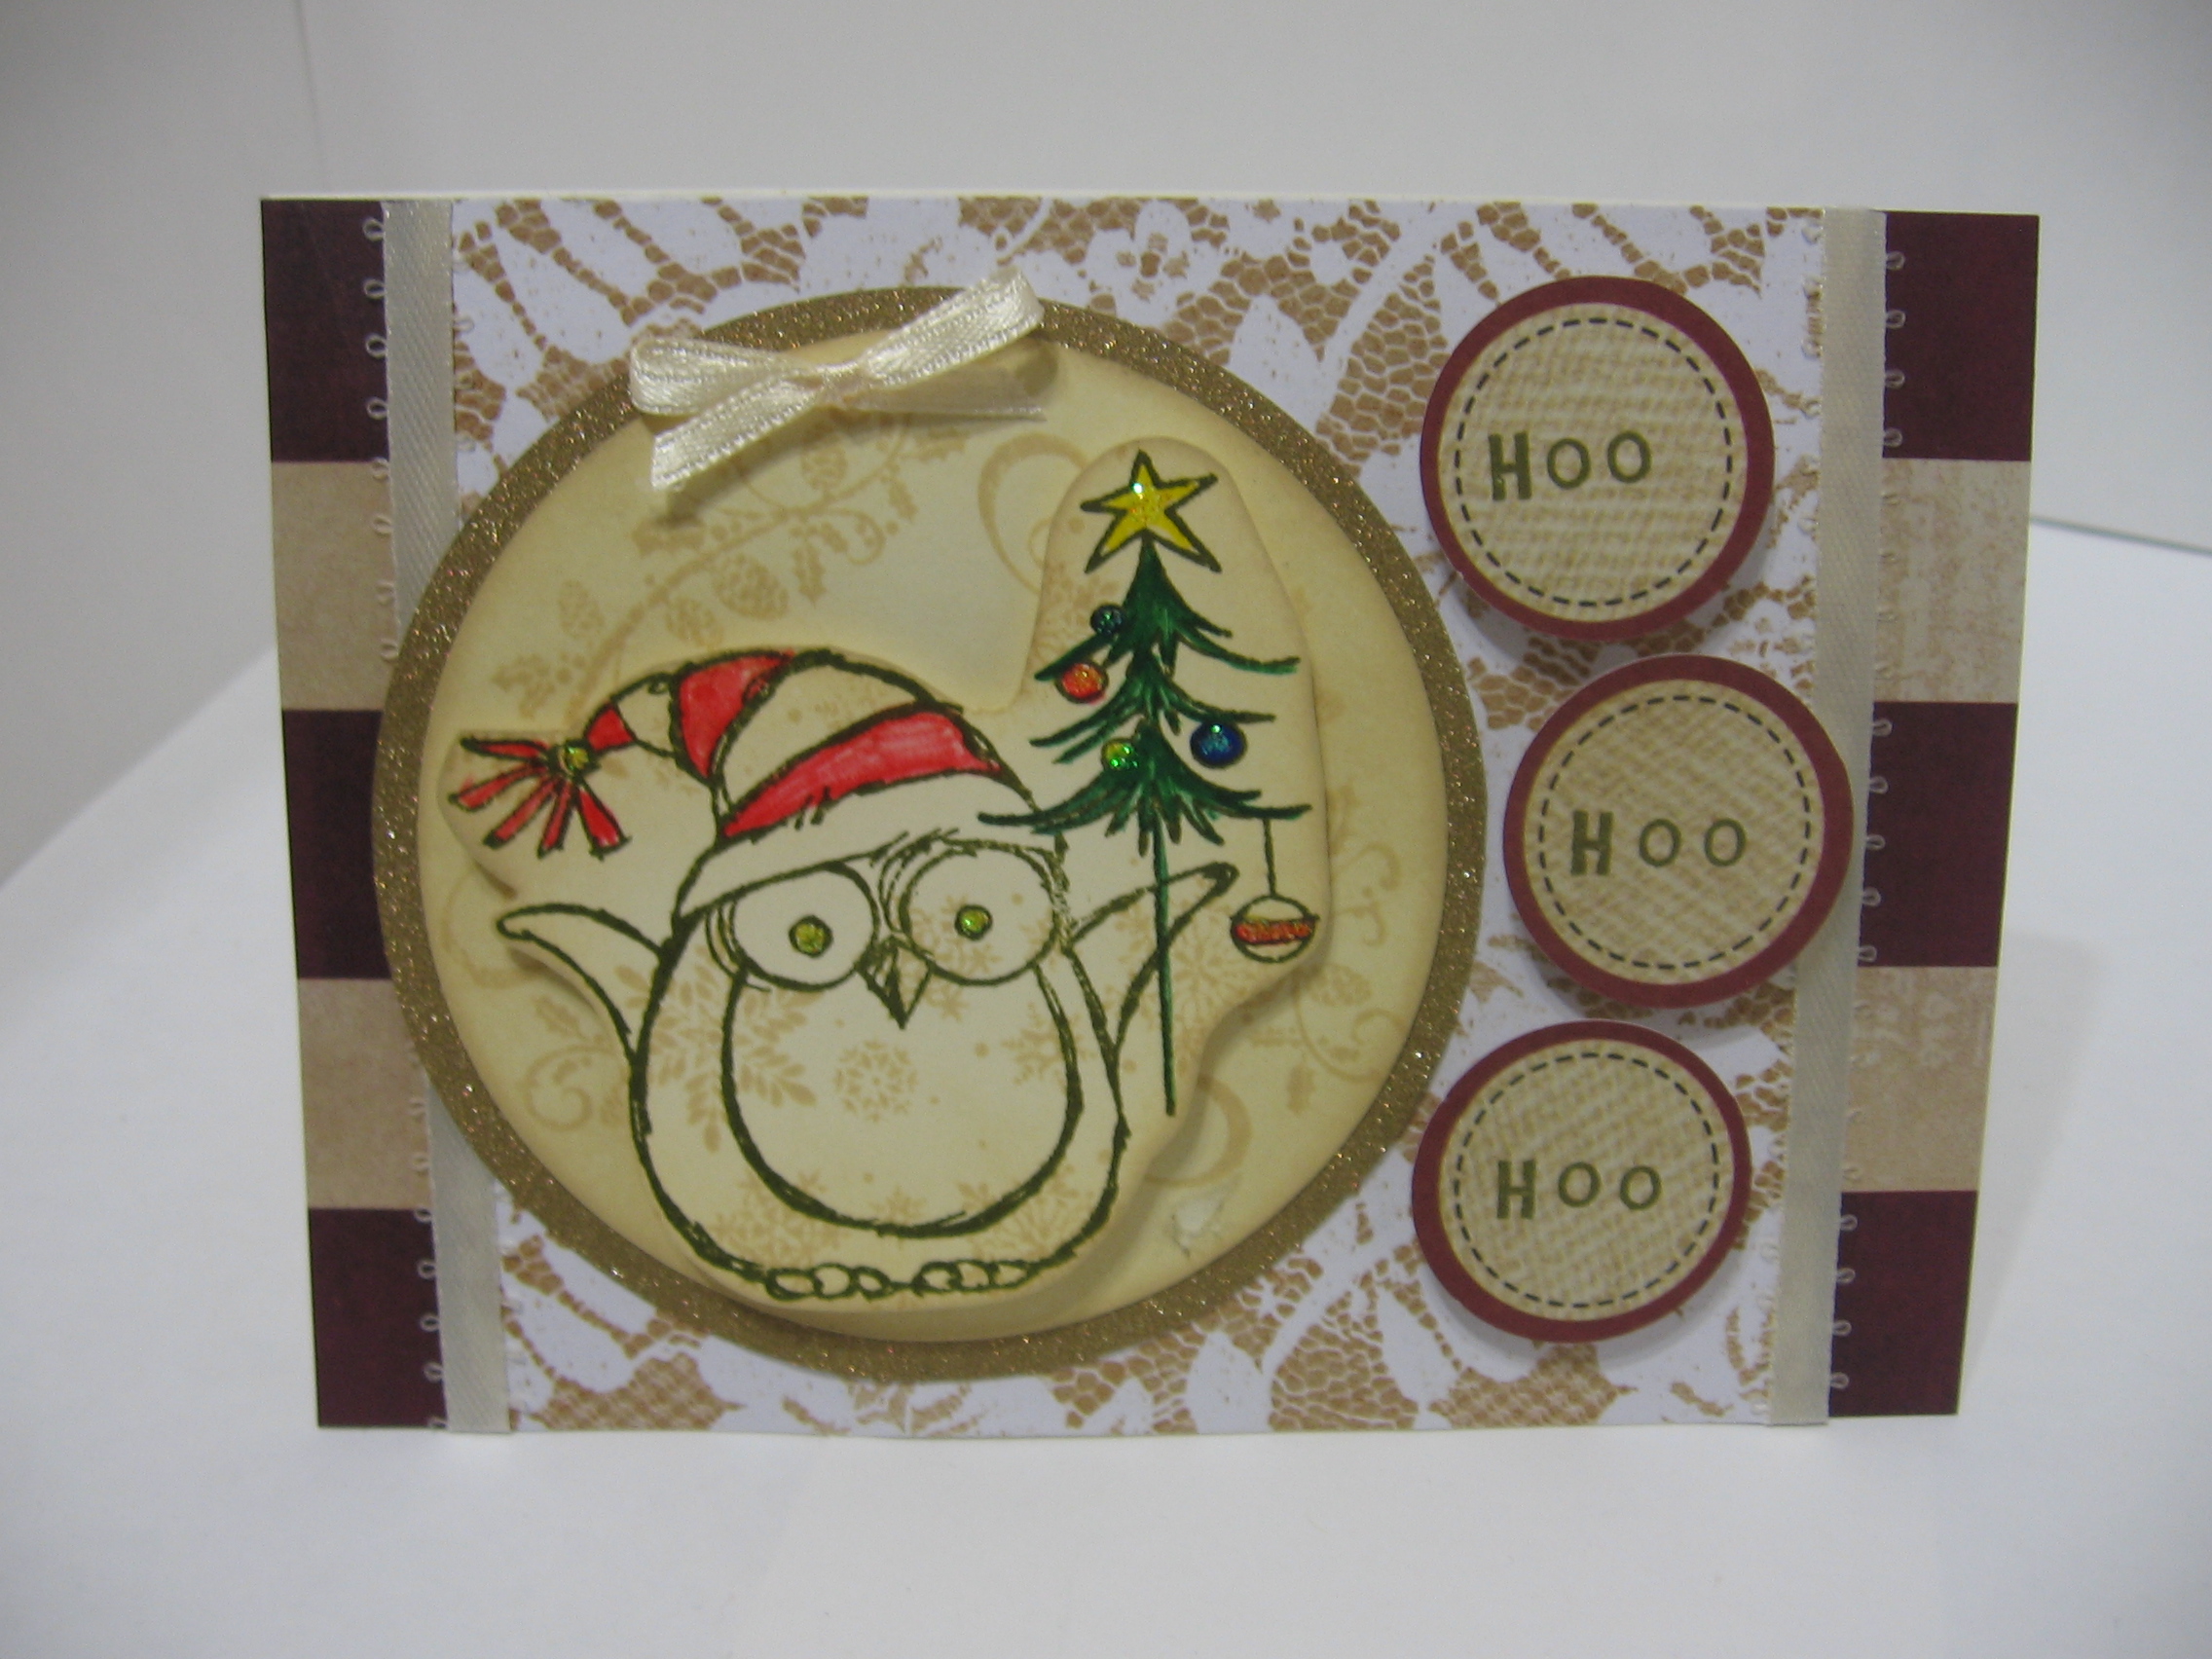
Some final thoughts: All of my cards are made by hand, but I do use some designer papers and store bought embellishments. My goal is to rely less and less on those things. At the moment, I do not own a Cricut or die cutting machine or anything like that. The cut-out the cherub and the bird with a hat images above were done with scissors. Yes, it was a pain in the butt – BUT, it was well worth it.
In my last post, I shared how my friends and I each created a unique card that began with the same stamp. A great way to spend a Sunday with friends!
However, most of the time I craft alone as I’m sure many of you do. I’d like to demonstrate how one stamp and a concept can change and improve over time.
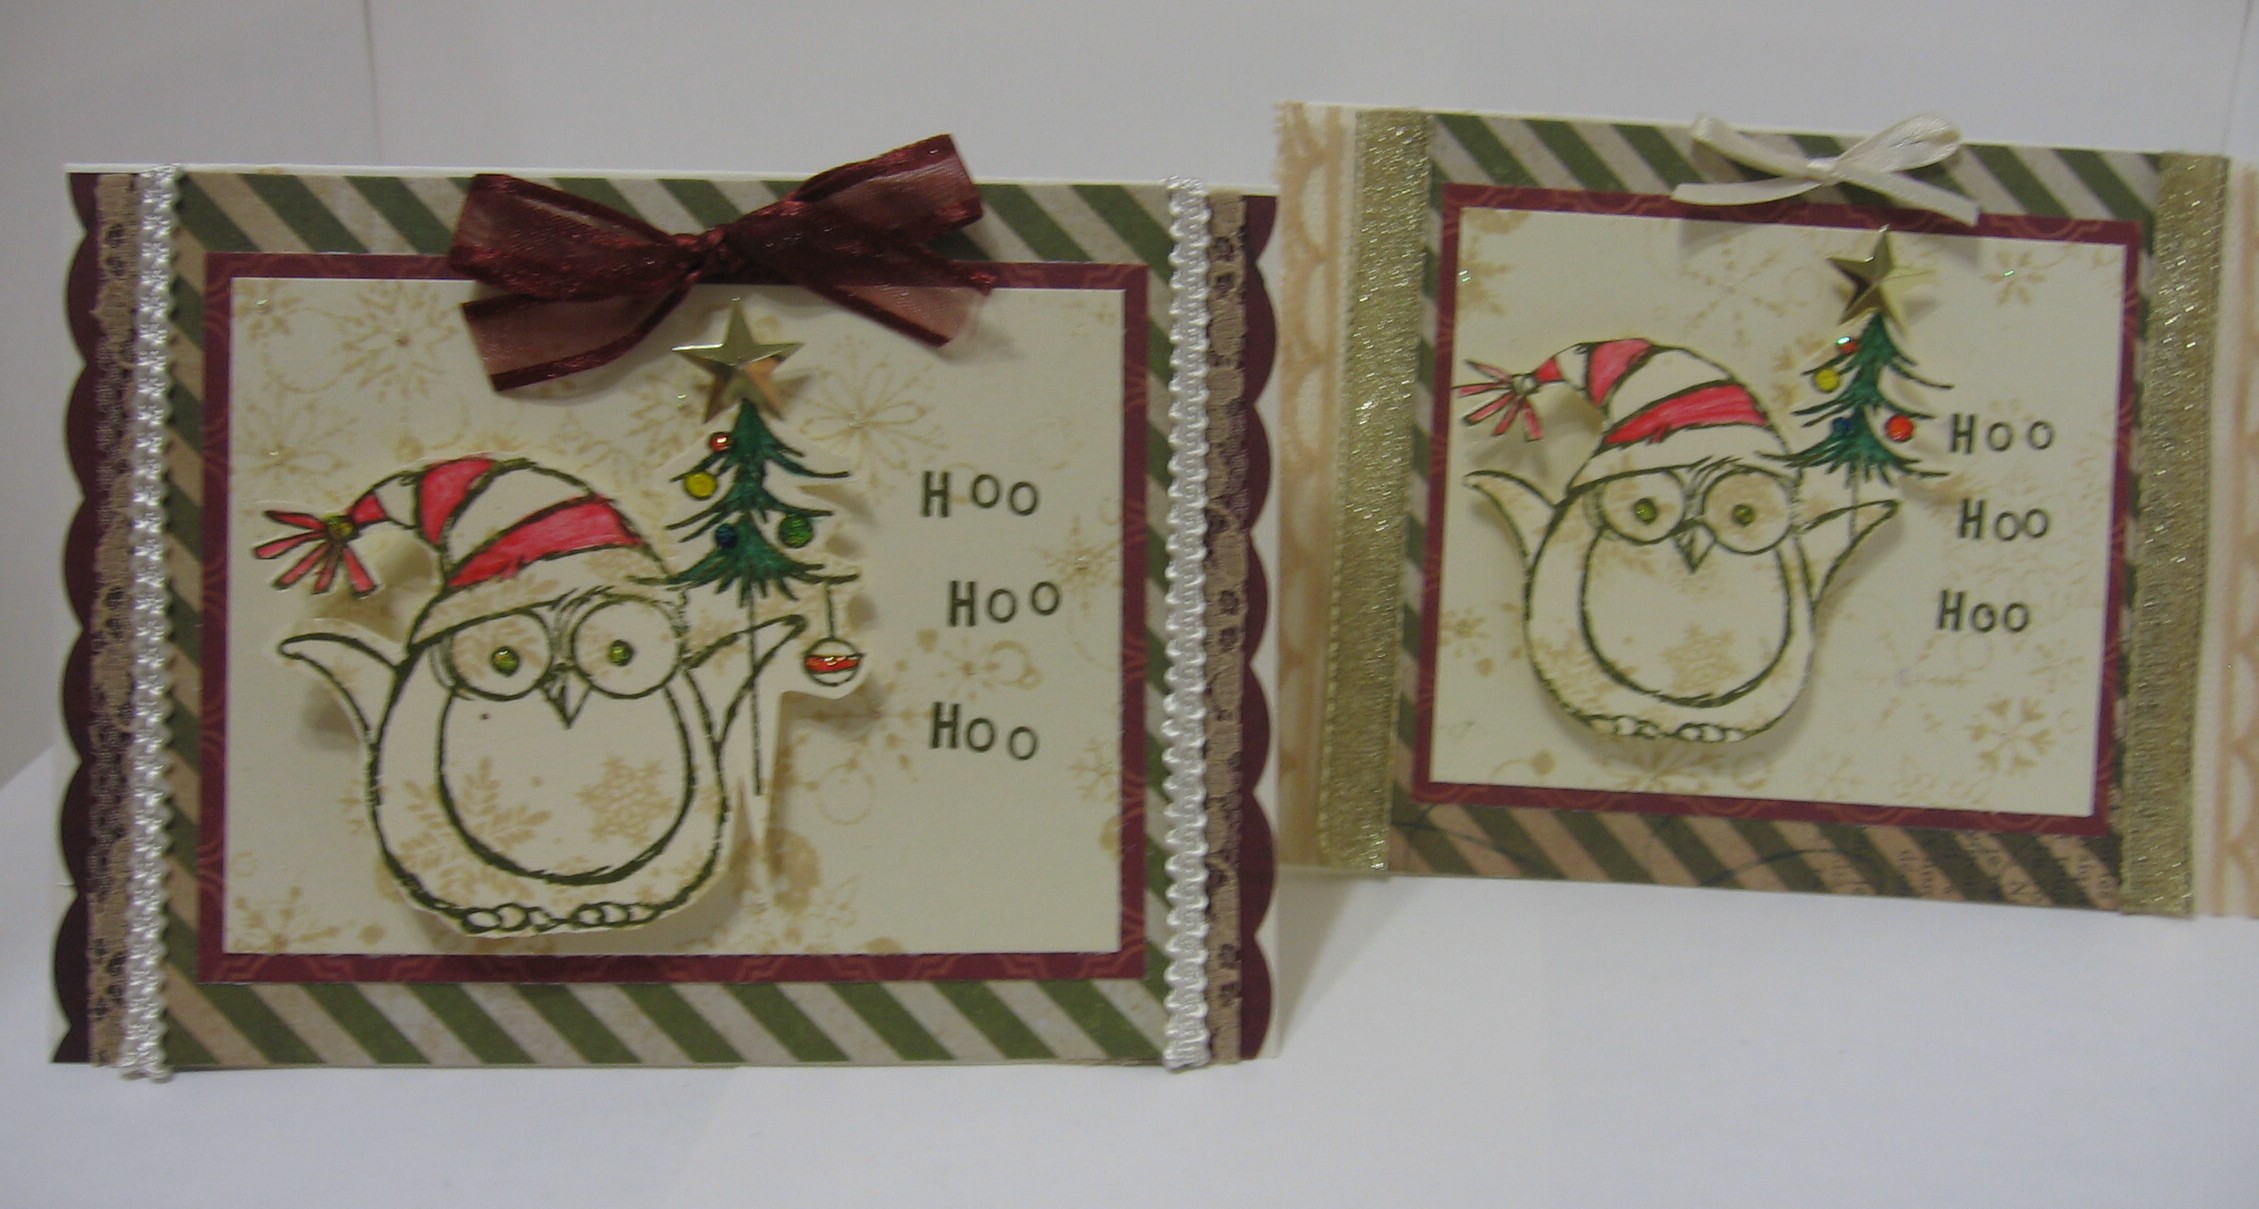
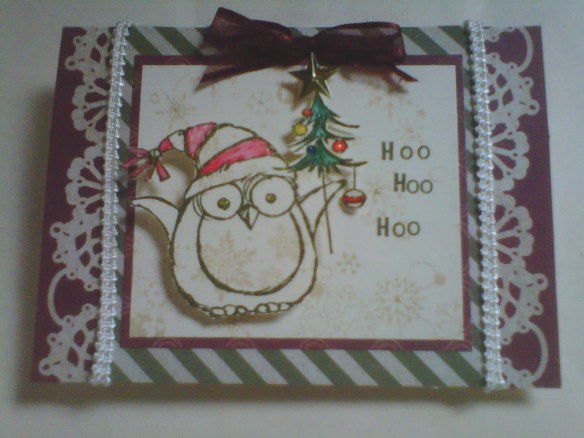
Here is the first card I made using my new Owl in a Santa Hat stamp:
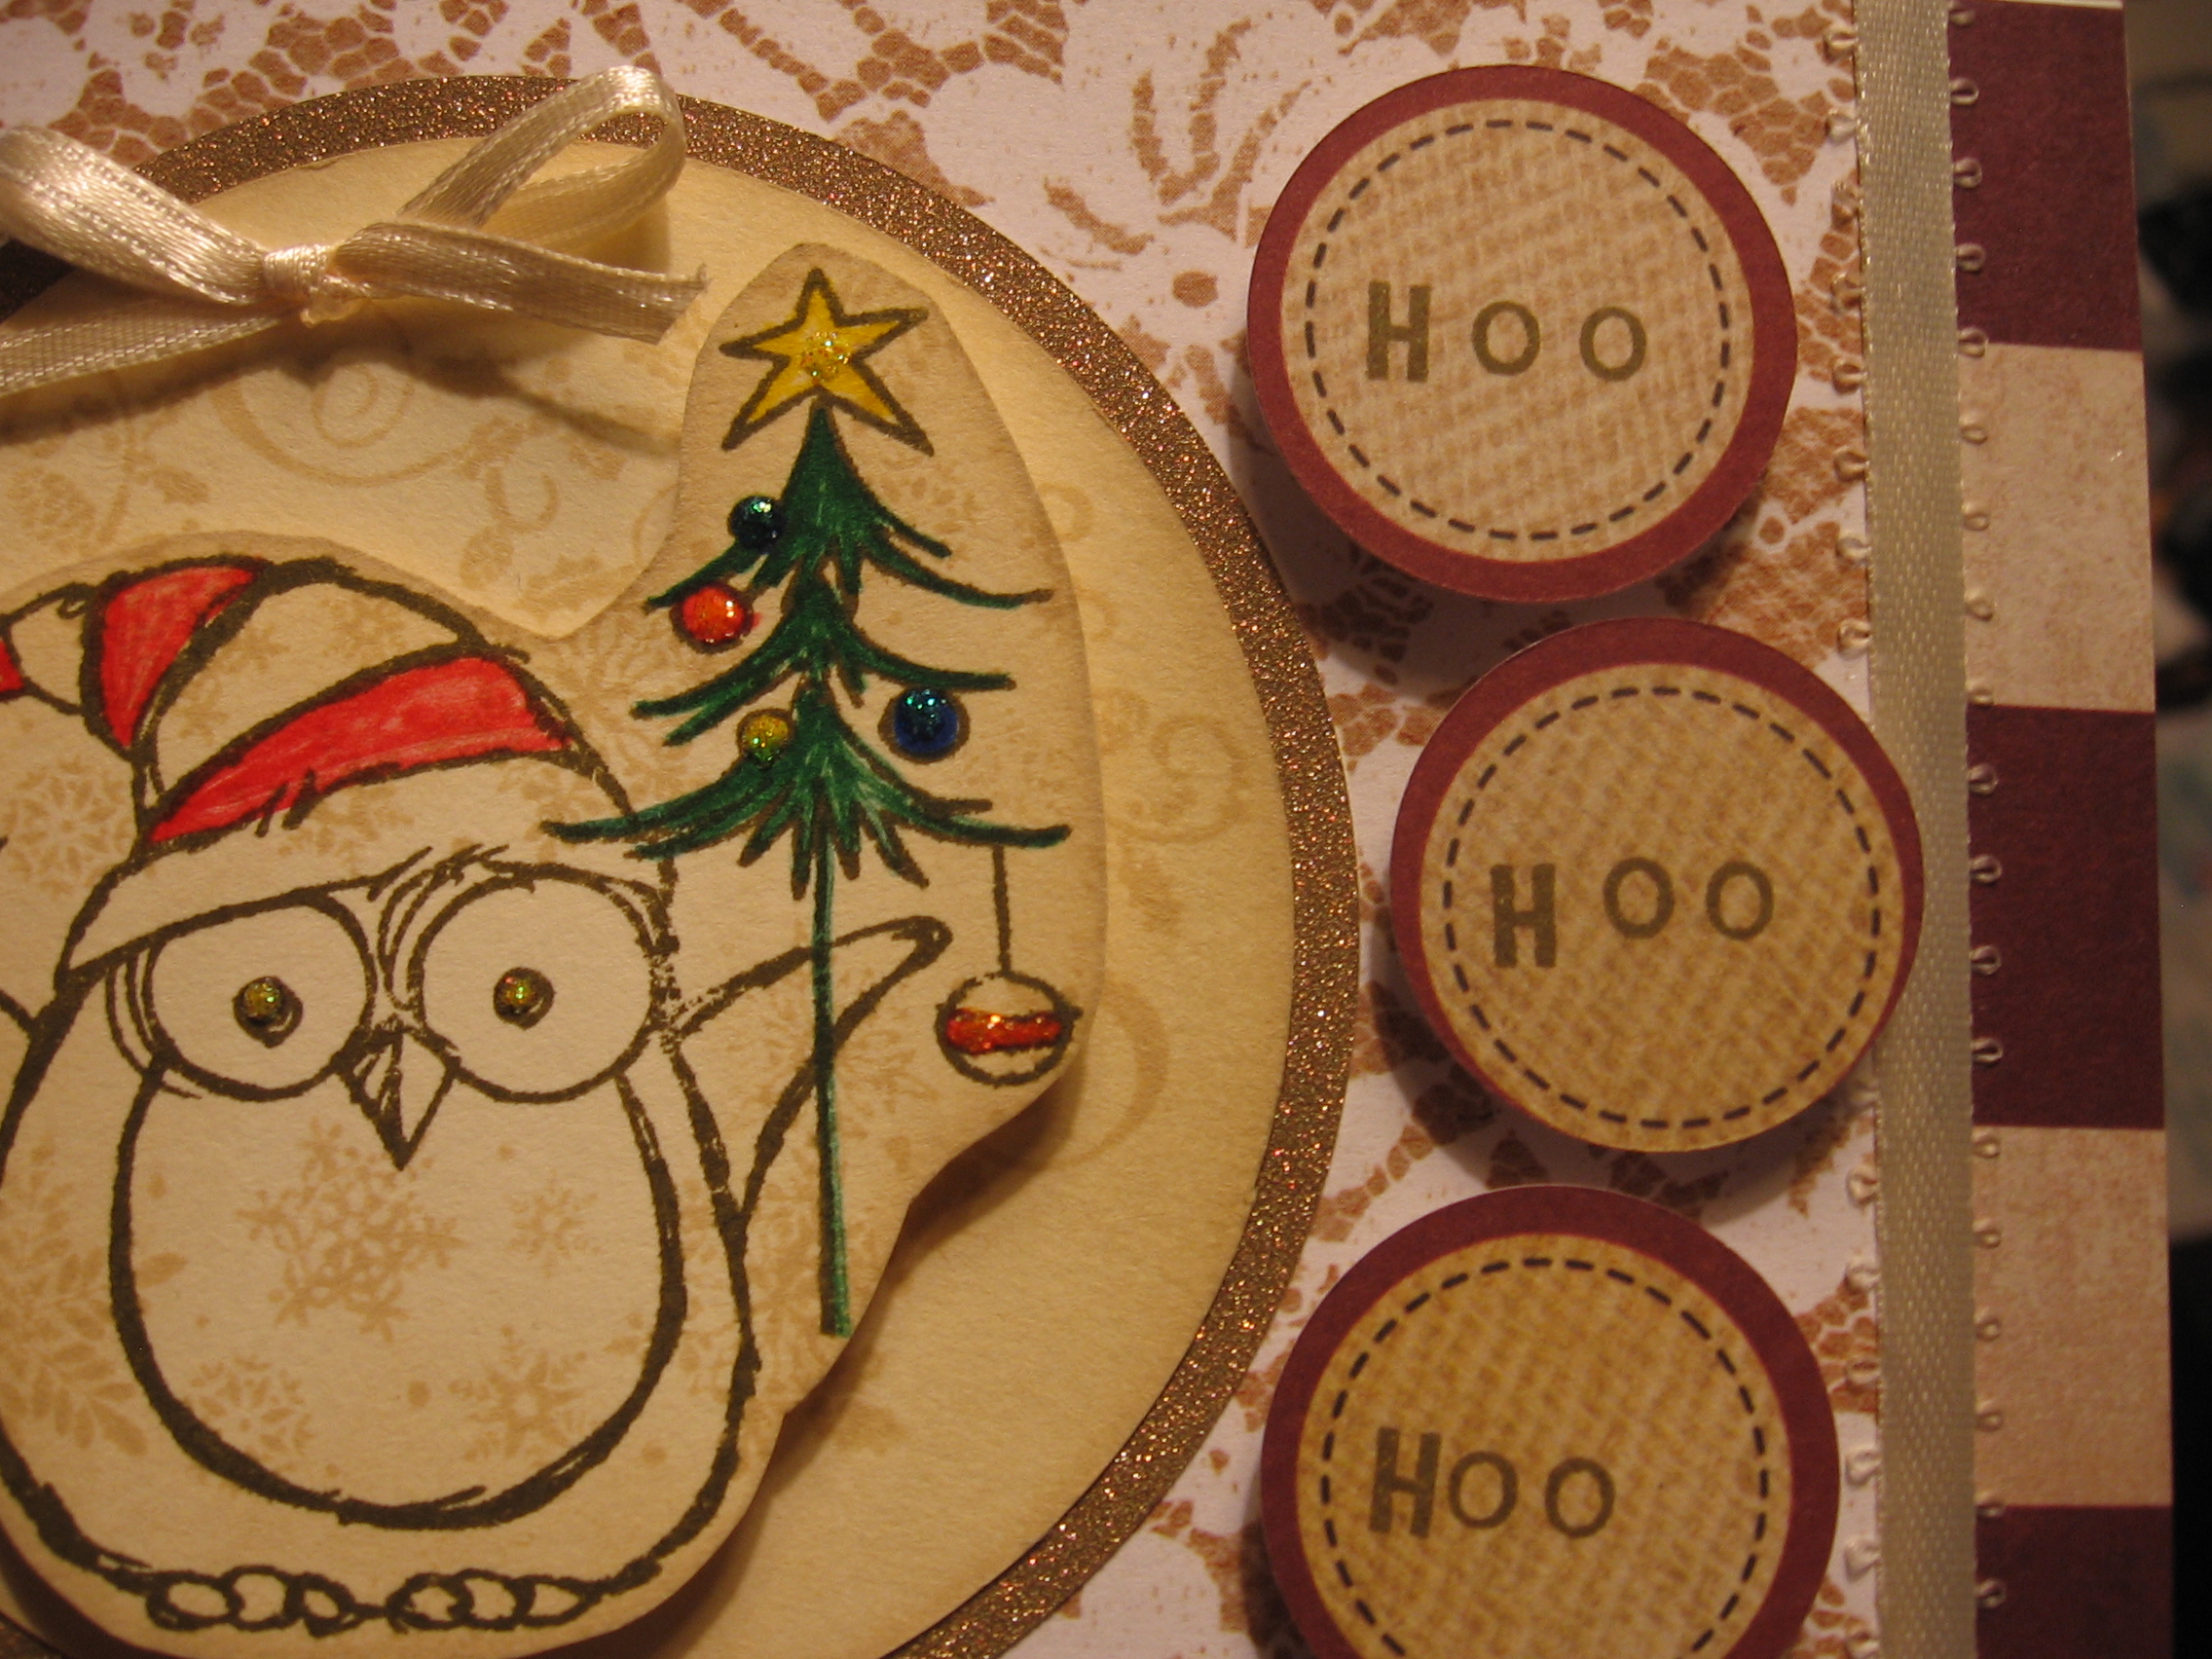
As far as techniques go, I used one snowflake stamp with Antique Linen distress ink and overlapped that with the owl stamp in Forest Moss distress ink (although any two inks could work, I think distress inks are more natural looking and easier to blend). I used some letter block stamps to add “Hoo Hoo Hoo” separately. I made the snowflakes along the bottom with a punch and added some rhinestones and a gold star for embellishment.
What I like about it: The stamps and the “Hoo Hoo Hoo” message are fun and exactly what I imagined they would be. I also love the antiqued quality of the color scheme as opposed to the bright red and green (and now blue) that are ubiquitous around the holidays.
What I don’t like about it: The main image is off centered because I didn’t allow enough room around my stamps for cutting a rectangle. I’m big on balance. Also, it feels a little flat and less than what I wanted it to be. In other words, meh.
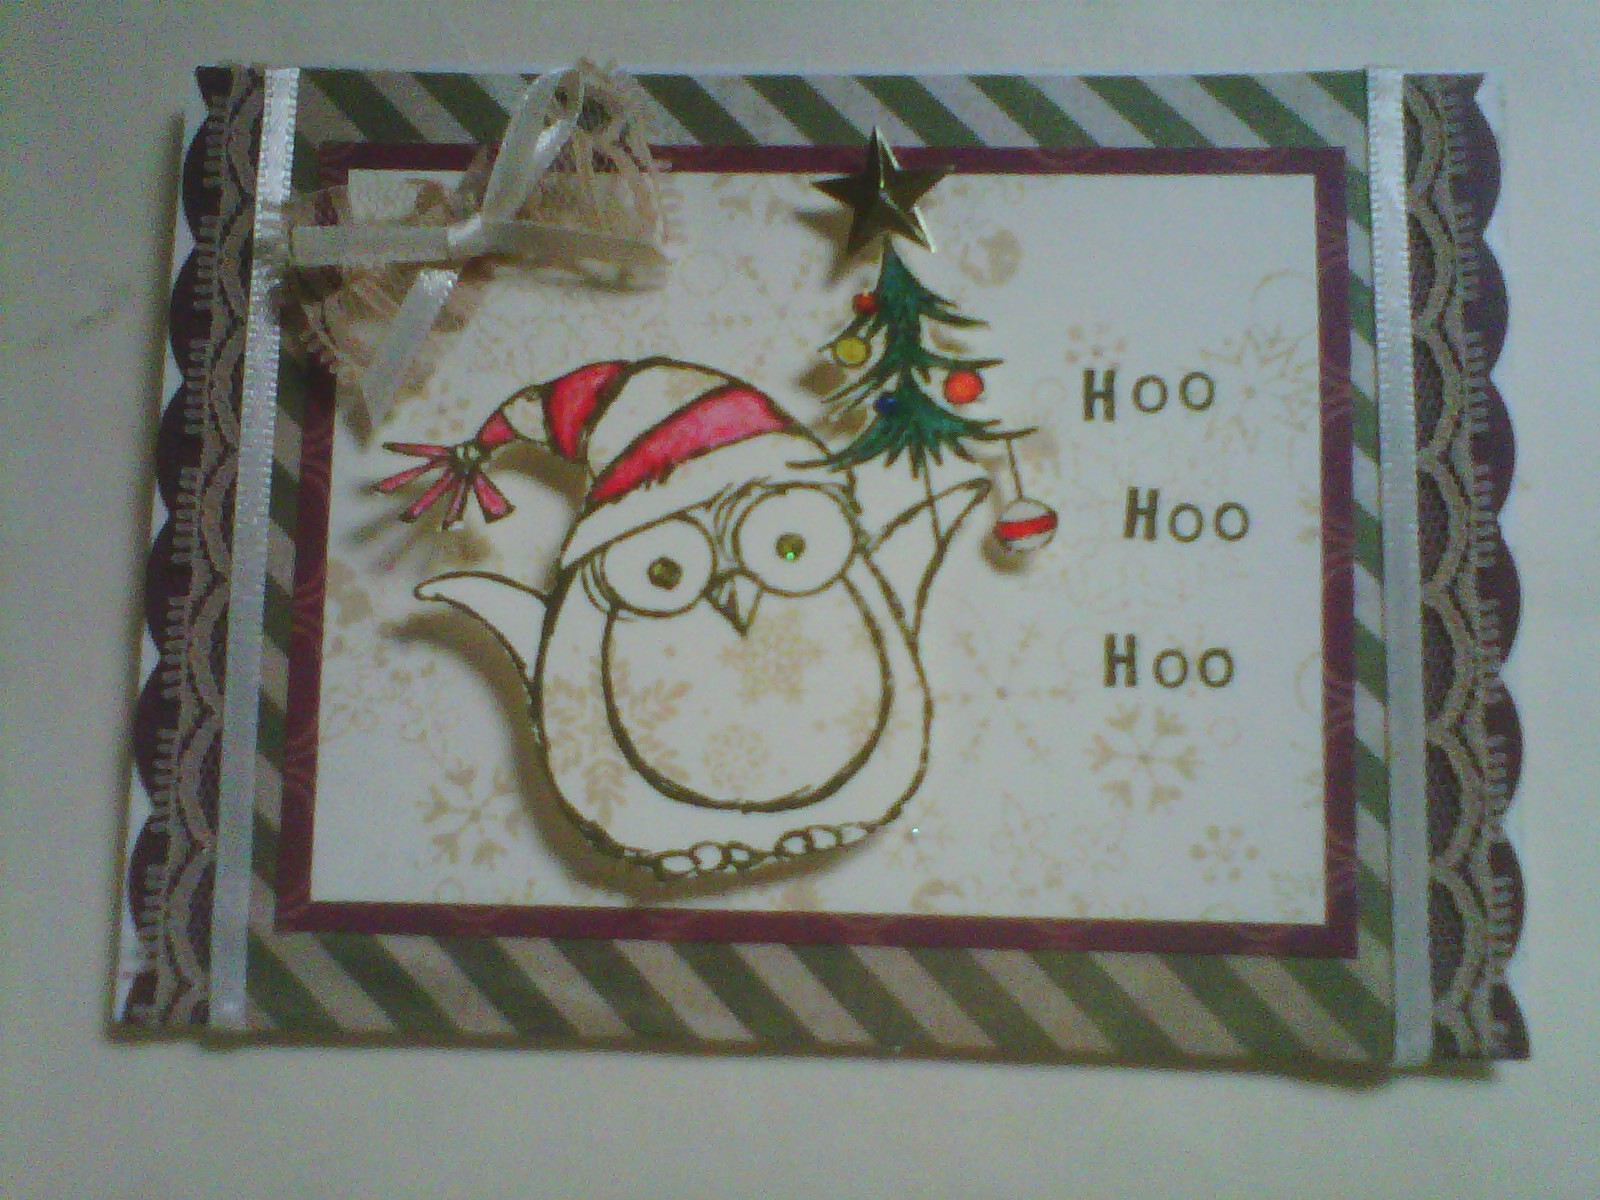
But look what happened when the second batch came out:
Definite improvement! I think my mom had just given me a huge bag of ribbon and lace and I found some great stuff to match my color scheme. Also, I made these cards AFTER I got together with my friends to make the Kitten in a Santa Hat cards. Having other creative people around really helped get my own creative juices flowing. I don’t know if I would have thought to cut out the owl and make it 3D otherwise.
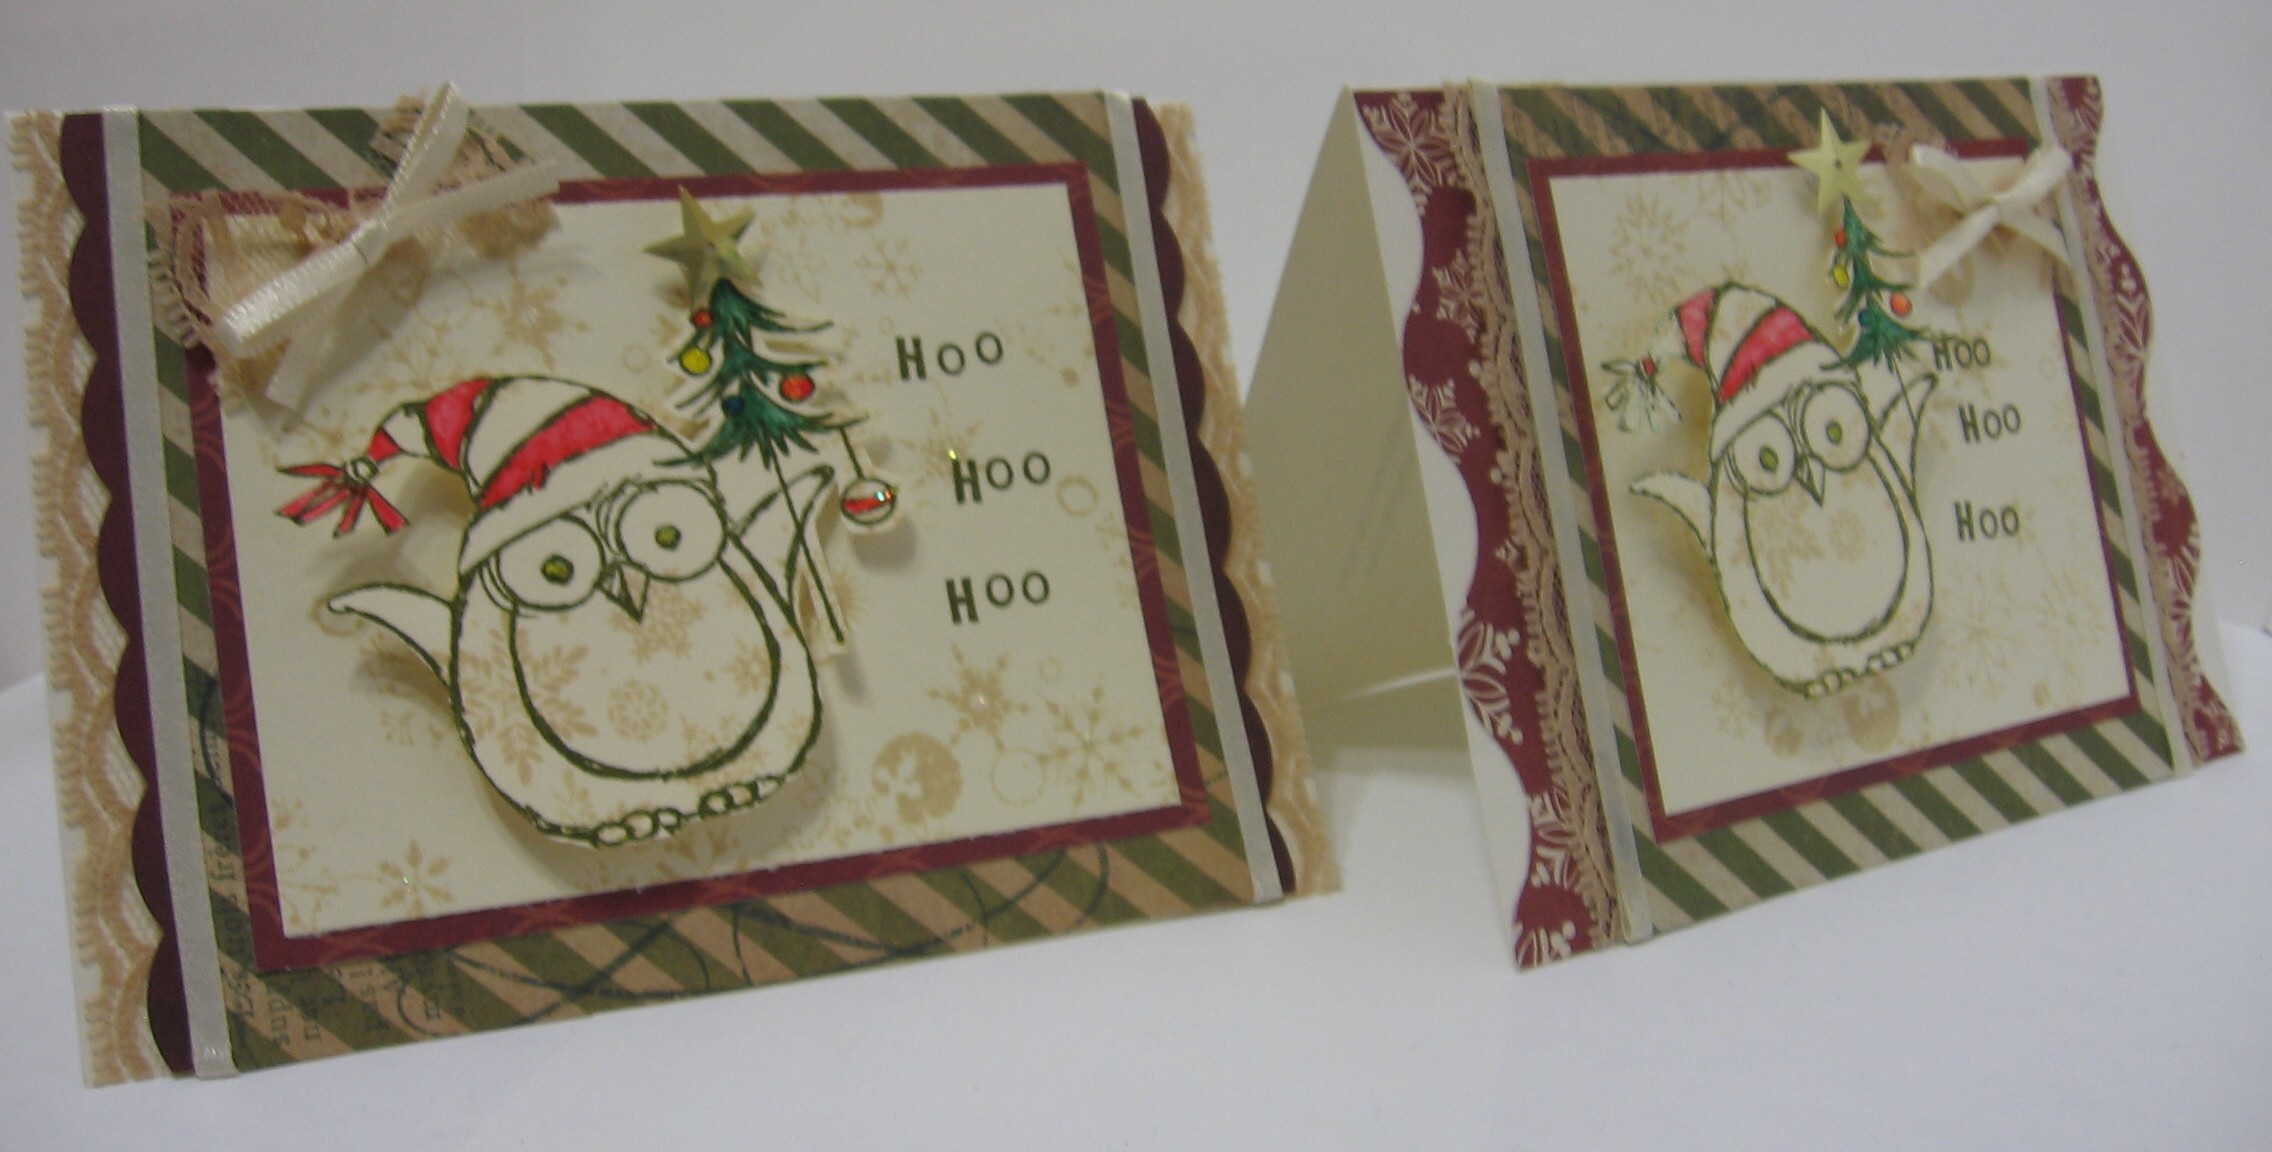
All the positive feedback (and subsequent orders to buy them!) inspired a third round of cards with this theme.
I incorporated more contrasting shapes and pulled those “Hoo”s up off the flat surface to balance out the 3D effect of the owl. It might be hard to tell but I also distressed around the edge of the owl and tree image.
Compared to that first card, these feel finished, refined, balanced, and just plain old pretty. I think it says a lot about our potential as crafters, and as people in general, how much things can change and improve in a short time if we open our minds to it.
And to all the people who’ve told me that they “aren’t creative” after seeing some finished product of mine like this, I say: This end product took time and practice as well as the inspiration and support of my friends and family. Not to mention the hours I spend researching different products or techniques and then trying them out for the first time only to completely destroy a project. It happens. You learn from it and keep trying.
I still have one more Christmas Card 2013 post so stay tuned. Thanks for reading!
Hello friends! This is a long time coming and so I’d like to jump right in. I’m going to start by posting some older content while I work out the kinks of organizing this new website. You may have seen some of this before, but new stuff is on the way!
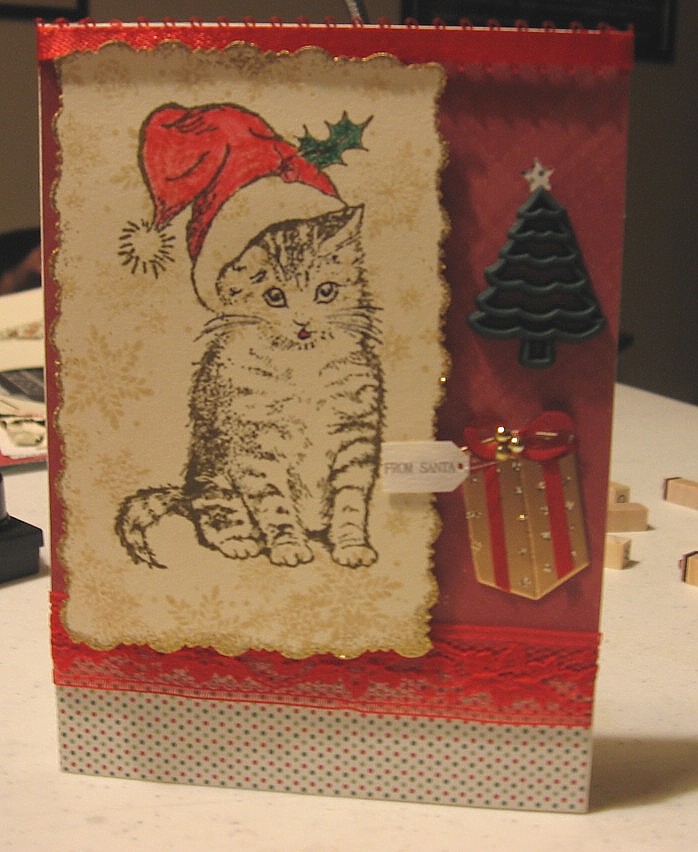
I have been meaning to post something about the holiday card workshop I hosted in December for a small group of my friends. We each created a unique look even though we started with the same stamp: an adorable kitten in a Santa hat.
Made by Keighley
A fun detail: Sarah’s card showcases the stamped paper we all used. We created it ourselves by stamping the cat in one distress ink color and overlapping it with a snowflake stamp in a lighter ink. The cat detail colors were added individually with markers.
Made by Sarah
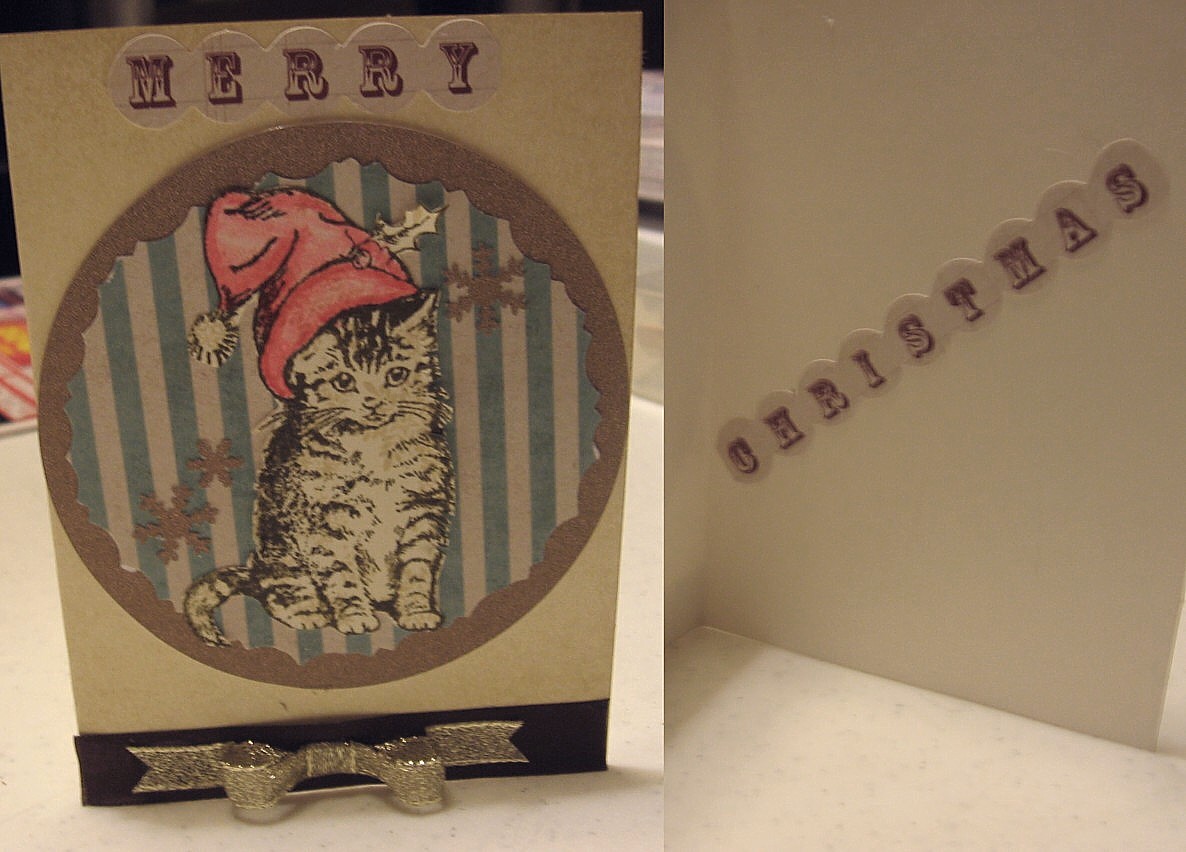
I wanted everyone to use “Meowy Christmas” but I was outvoted.
Made by Maria
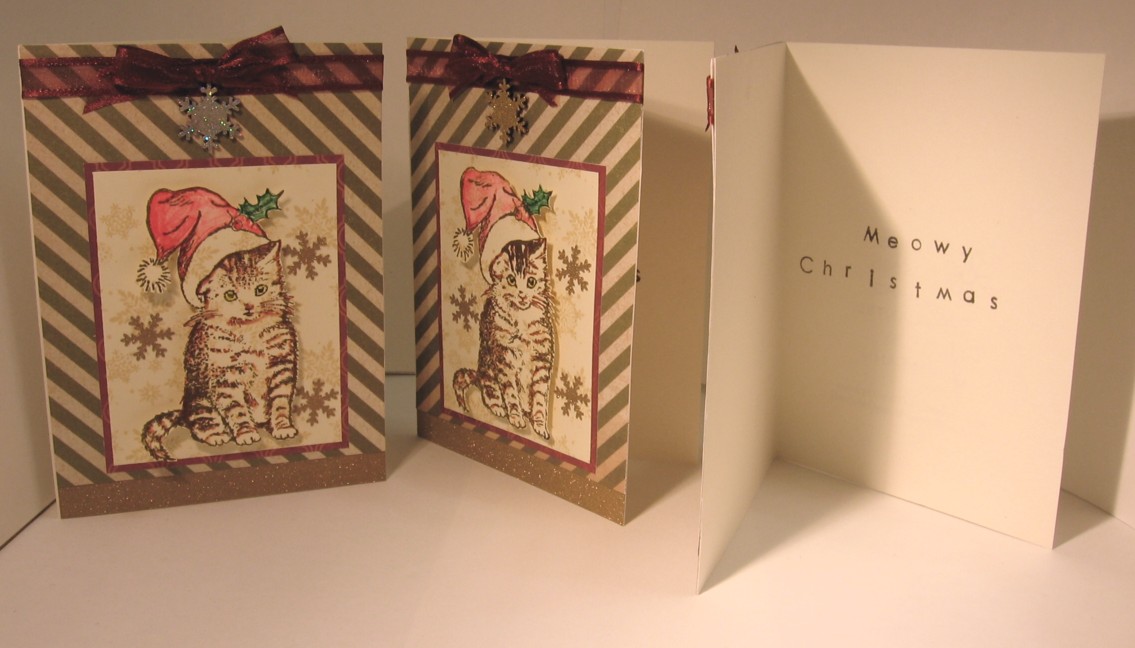
And finally, my own set. Mind you, I had more time to finish these up after the party was over.
Made by Leann
Not bad for a few ladies getting together to make cards for the first time. I am very proud of what we all accomplished and hope to have more workshops in the future!


